by Briscoe White | Aug 25, 2011 | Miscellaneous |

- This was the mother plant that we harvested the seeds from!
About mid June, we were faced with a comfrey seed crisis. There are only a few reliable sources for all but the most common herbs. No one had any and we had a deadline; if we were to have comfrey plants for fall– we must sow seeds now!
With nowhere else to look, we turned to our own garden. Just last year we had planted several comfrey plants in the garden surrounding the office. Seek and you will find! There on spent flowers stalks were the seeds we needed. So we sowed seed we collected and the young comfrey plants pictured here, are second generation Growers Exchange. These plants will establish this fall and return in spring as full grown plants, expect blue flowers in early summer.

Our NEW Fall comfrey plants, grown from seeds harvested here at our farm!
The photo pictured above is a shot of our new comfrey plants! From the seeds that we harvested in our own gardens here on the farm, these plants have grown to be huge and healthy! We’re just about ready to ship them from our garden to yours, so get your orders in today to have first choice of these terrific herbs!
How can comfrey benefit your other plants? Read our previous blog about comfrey’s amazing ability to activate your compost and fertilize your garden! Looking for tips on how to grow the best comfrey plants? Check out Briscoe’s Tips to get the “dirt” on growing great plants!
by Herb Exchange | Aug 22, 2011 | Miscellaneous |

Being the resident “crazy cat lady”, our Marketing Director Caroline, rescued two flats of Catnip this past season that were past their prime for selling and were bound for the compost pile. Here’s her experience with biting off more than you can plant and finding a great way around it!
Admittedly, as stated above, I’m a little kitty crazy. My whole house is filled with cat toys and scratch posts and I’m even thinking about buying Cat Bubble Backpack because one of my cats loves to explore! So when offered the abundance of Catnip that was about to head to the big compost pile in the sky, I excitedly threw two flats into the back of my Jeep. I promised myself that I would find room as well as time to actually plant, which I quickly realized upon getting home and assessing my two overflowing gardens, that it just wasn’t possible to find homes for these plants. Not wanting it to go to waste, I decided to save what I could by harvesting the plants to dry them for later use.
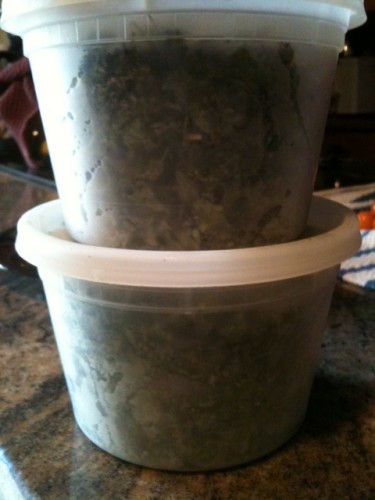
I began by clipping each plant at the soil level with a pair of sturdy gardening scissors. I piled the plants up into a shallow tupperware container, with all of the stems facing the same direction. Instead of hanging them in bundles to dry, I simply placed the open container piled high with plants on the top shelf of my pantry where it would be out of the way ( I didn’t want my boyfriend to think it was something to cook with!), in a dark, dry place and out of reach from my two mischievous indoor cats. After about a month of forgetting it was still there, I took the container out and assessed my project. The once formidable pile had dried to a much smaller version of itself, making it much easier to manage.
I got a large mixing bowl, and for about thirty minutes, just stood at the kitchen counter, removing all of the usable parts (leaves, some flowering heads, small pliable stems) and adding them to the bowl. The stems, I tossed to the floor for my cats to play with in between begging for the “nip” I was currently working on. After removing all of the good stuff from the stems, I broke up any large pieces or stems by hand in the bowl. I found two recylced Chinese food containers to pack everything into and popped them in the freezer. Storing it in the freezer keeps them fresh for a longer time, and also triggers a frantic dash for the fridge from my cats, any time I open it to get a Popsicle. Give this little trick a try next time you have too many herbs to handle. You can extend the plant’s useful life and enjoy fresh herbs for everything from your cats to culinary use, for much longer!

by Briscoe White | Aug 16, 2011 | Miscellaneous |
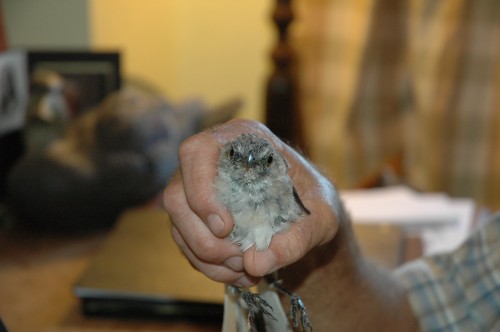
A natural showman, the mockingbird has a long reputation of being one of the feistiest entertainers in the animal kingdom. We had the opportunity to meet one, up close and personal, when he flew down our chimney this morning and flew into my office! Luckily I was able to catch the fidgety little fledgling and safely return him to the great outdoors.

Here's a blurry shot of me chasing him around the room -- man he's fast!
He was quick, but I was quicker!

After a few minutes, I caught him long enough to pose for this picture!
After the paparazzi was finished, I released him outside so he could rejoin his momma!

"Release the hounds"...er, i mean ...Mockingbird!
by Briscoe White | Aug 12, 2011 | Miscellaneous |
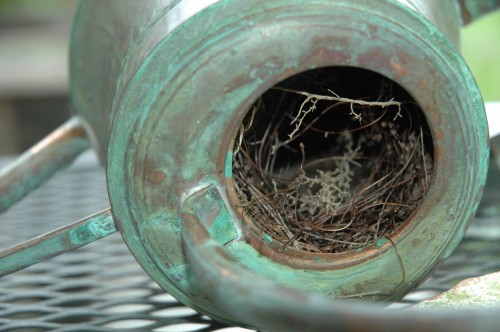
Carolina Wrens will nest just about anywhere...even in our empty watering can!
Carolina Wrens, though territorial about their range, are not picky about where they nest. Old boots, propane tanks, watering cans, mailboxes and pots…these are just some of the man made abodes that wrens have claimed as their “home sweet home”. Using everything from small sticks, moss and roots, to snakeskin, plastic bags, hair and paper, Wrens are resourceful home builders!
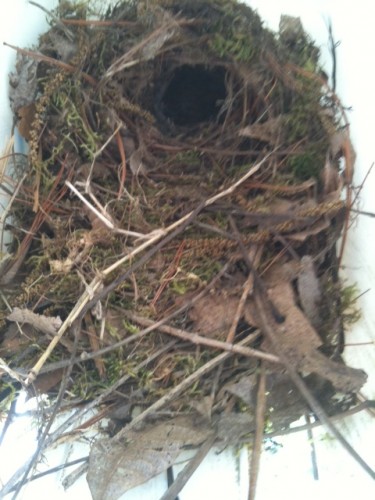
Wrens built this cozy nest in our marketing director, Caroline's, grandma's newspaper box!
The mating pair, which stays together for life, spend their time foraging for sturdy materials for the curved outer walls, and finish the inside up with softer nesting materials. Wrens may also build many mock nests throughout their territory, which are commonly called “cock’s nests”, choosing their favorite home for the nesting season once they are actually ready to mate. These domed nests are never used more than once and usually take about three days to construct. Once finished, the pair mate and the female lays a clutch of between three and seven small eggs that are cream colored with small brown speckles. To watch them in action, check out this great YouTube video of a pair of Carolina Wrens adding to their nest! Building a Carolina Wren Nest.
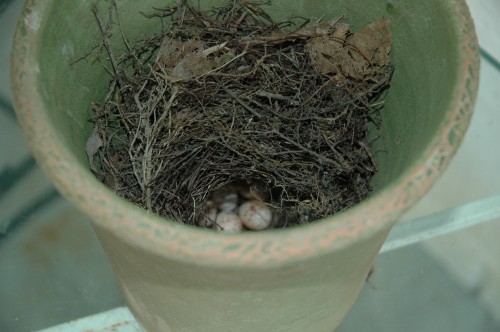
Our wrens chose the stylish pot on our office's front porch to nest in. They must not be bothered by the constant activity here since they've already laid eggs!
For a hilarious and heartwarming story with great pictures documenting the baby wrens, check out this website on the wren’s unusual nesting locations, and read about Karen Ouimet’s indoor wren experience!
by Herb Exchange | Aug 5, 2011 | Miscellaneous |
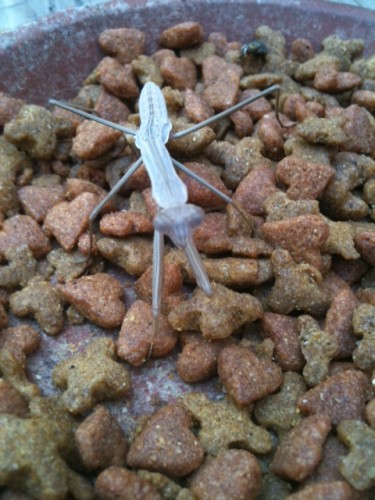
Our Marketing Director, Caroline, discovers the bug-eat-bug world in her backyard…
So while gardening yesterday evening in my backyard oasis, I stumbled across a clever praying mantis, strategically positioned in my cat’s food dish. I say “stumbled upon”, because I literally almost brushed it out of the dish, thinking it was a stray leaf cluttering my cat’s dinner. At closer inspection, I saw that it was a mantis who had camouflaged itself to blend in with the muted, neutral colors of the dried pellets and worn clay dish that housed them. As I watched the mantis carefully, I realized that my first thought that it had been attracted to the food was incorrect; instead, it was hunting bigger game.
All summer long we have been battling flies that have been swarming our kitties’ dishes of dry food and water. We’d tried everything from placing potted herbs nearby in hopes to thwart them naturally, good old-fashioned (and very satisfying, I may add) fly swatters, and even hanging sticky fly strip paper from the banisters to keep these constant clouds of flies at bay. Watching this mantis dispatch the flies hungrily, gave me hope that maybe the battle could be won! I settled in to watch the struggle, capturing everything with my camera.
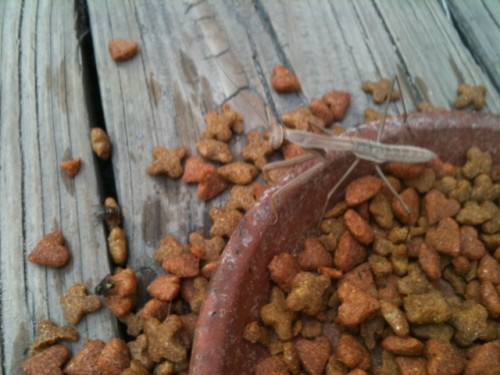
The mantis started by stalking the two flies in front of it, just outside of the dish. While they greedily ate the pieces of cat food, they never saw this cunning, camouflaged hunter creeping up on them! His large eyes kept the mantis on the look out for any dinner opportunities that may have landed in his peripheral vision, and he kept moving his head back and forth almost like a radar antenna in search of movement.
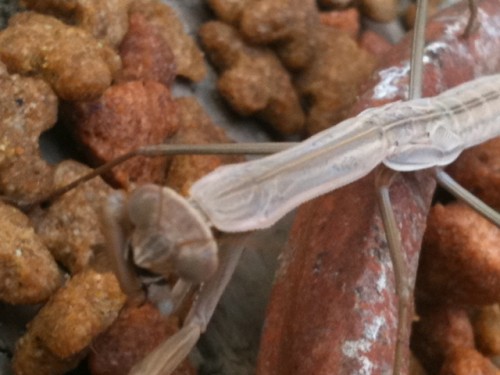
As slowly as I’d watch it move, the mantis struck out so fast for the fly that I didn’t see it. He’s got his dinner in hand, now!
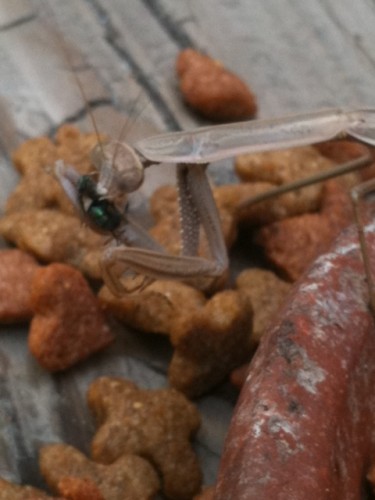
And at last, this hungry mantis is feasting on the fly!
This is just another example of how some insects can be really beneficial to your home and garden. Before dropping an atomic bug bomb or squishing anything with multiple legs that scurries past, keep in mind that it could be your best defense in the war against harmful pests. For a great resource, check out What’s That Bug.com, for more information on identifying the good, the bad and the bugly!
by Briscoe White | Aug 2, 2011 | Miscellaneous |

Back by popular demand, we have Bay Trees! OK well, to be fair, they never actually left, they’re just really hard to find. You can thank their high popularity rating as a savory, flavor-filled culinary herb and their slow rate of growth for that. Because we love them so much, and we know you all do, too, we’ve ensured a large crop for our shipping season this Fall, for all of your delicious holiday meals. If you’ve never grown Bay before, don’t worry. Read on or check out Briscoe’s Tips for some great information on how to keep this robust herb happy and healthy, all year round!
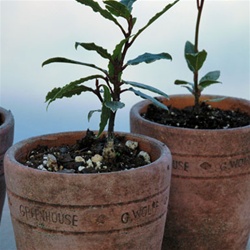
Bay makes a wonderful potted herb and if given well drained soil, and plenty of sun, you could literally grow a tree full of delicious Bay leaves. At its maturity, a Bay can reach about fifteen feet high and approximately twenty feet wide, but actually responds well to staying pruned into a container-planted shrub. Though Bays are more akin to turtle than hares, in terms of their growth rate, giving them the appropriate amount of space dictates their size quite a bit. Make sure than you give your Potted Bay a large enough planter, because, keep in mind, it IS a tree! That being said, a pot about twelve inches in diameter will grow your plant to about five feet tall before you need to re-pot your Bay into a larger container.
Bays have a shallow root system, and prefer fertile, well drained but moist soil. If the situation allows, leave your Bay outside while it’s nice and sunny to allow it to get full, unfiltered light, making sure that it doesn’t completely dry out while in the sun. If the outdoors is not an option, give your little tree as much direct, clear sunlight as possible. You may need grow lights to keep this herb happy throughout more dreary, cold months. While indoors, also beware of placing your plant near heating vents or where it could catch a draft from an open door. They can be VERY temperature specific!

A native to the Mediterranean, Bay is also very useful outside of the kitchen and makes a highly beneficial medicinal herb. Bay contains healthful components that make it antiseptic, antioxidant and perhaps even an anti-cancerous herb. A wonderful source of vitamins A and C, folic acid, and B-Complex groups such as niacin, as well as many necessary minerals like potassium, calcium, iron and magnesium. Combining these powerful, health boosting properties, Bay is useful in healthy digestion, strengthening the immune system, healing to heal wounds more quickly, and among other things, aid in regulating your body’s metabolism. So while you may be adding this deliciously aromatic herb to your favorite recipe for its great flavor, you’re actually helping your body in lots of different way to stay healthier!


