How To Build A Butterfly Oasis

Butterfly gardening can be a wonderful way to experience wildlife in your garden, encourage pollination, and it takes very little maintenance, giving you more time to enjoy the beauty of watching butterflies flock to your plants. Many people who have maintained a butterfly garden for such a long time actually enjoy having visitors to come and look at their creation. This is also a great way to give back to your local ecosystem, as many natural habitats for butterflies and other pollinators have been destroyed by urban development and human interference. We always let about half of our test garden go wild in the summer, in addition to the many flowering shrubs and trees throughout the yard, to give butterflies a safe place to feed and lay their eggs. This is common practice, and we let this happen until the flowering shrubs and trees start to become an issue.


Here’s a wonderful photo showing a Fennel plant hosting Eastern Black Swallowtail butterfly caterpillars

In planning your butterfly garden, make sure to plant plenty of host plants and feeder plants. Host plants are specific herbs, flowers and other plants, that mature butterflies lay their eggs on because they create a safe haven for their young who will also feed on these plants once they become caterpillars. Be aware that these plants will be the sole food source for caterpillars, so it will be pretty heavily snacked upon. Because these may look rather ragged by the time the caterpillars are done munching on them, you may want to add these to the back of your garden, but still close to feeder plants so that the caterpillars are able to find them easily in their next stage of life. Some common host plants include Fennel, Italian Flat Leaf Parsley, Dill, Broccoli, Sunflowers, and Butterfly Flowers (also known as Milkweed).


Butterfly on the flowers of oregano (lat. Origanum vulgar)

Feeder plants are nectar rich plants that adult butterflies will feed on throughout the season. These will also attract other helpful pollinators to your garden like honeybees and hummingbirds! Feeder plants tend to be fragrant and brightly colored, and you may be surprised to find that you already have many in your garden already. Some common varieties from our garden include Lantanas, Buddleias (also known as “Butterfly Bushes”), Joe Pye Weed, Bee Balm (Bergamot), Garlic Chives, and Oregano.


  • Remember to plant your perennial butterfly plants toward the back of your garden and your annuals toward the front, for easy seasonal replacing.
  • Don’t forget to incorporate herbs into your butterfly garden! Many herbs are perennial and will provide you with a safe haven for caterpillars and beautiful blooms when they flower. You can also use them in many other ways!
  • Choose an area that is protected by the wind, as butterflies are delicate and don’t want to fight strong breezes to feed.
  • Provide a water source, such as a birdbath or a shallow bucket filled with water with sand in the bottom.
  • Avoid using pesticides on your plants as these will harm the butterflies and their young.
10 Herbs to Plant in Fall for Gardens & Containers

10 Herbs to Plant in Fall for Gardens & Containers

Autumn is fast approaching, and you know what that means: put your white wardrobe in the attic! And, for some gardeners, it may signal something else: the end of the growing season. Truth be told, however, fall is an excellent season to plant herbs in the garden or containers. What do you need to know about planting in the fall? Which herbs should you choose?

What You Need To Know

If you’re a “fallscaping” rookie, here are a few things you need to keep in mind:

What is fall?

This probably sounds like a pretty basic question, right? There might be more to it than you think! Your fall season depends greatly on your hardiness zone. So, what are some basic “requirements”?

  • The Fall Season is between Labor Day and the “Fall Back” Daylight Saving Time.
  • Your temperatures should maintain a daytime high below 80 degrees.
  • Your first frost should be at least 10-6 weeks away.

What’s the latest I can plant?

Our advice: don’t drag your feet! Go ahead and preorder your herbs so that they arrive right on time. What are the dangers of procrastination? 

Young herbs (especially perennials) need to “harden off” before the first frost, which basically means they need to acclimate and toughen up to lowering temperatures! If they aren’t given enough time for this process, let’s just say… you’ll be left with a pretty sorry-looking plant.

How long do herbs need to harden off?

  • Perennials (especially woody varieties) require 8-10 weeks.
  • Annuals and biennials require 6 weeks.

Will planting Perennials in the fall hurt them in the long run?

Nope! It turns out Kelly Clarkson is right: What doesn’t kill you makes you stronger. Facts show that perennials that are hardened off and experience their first winter as a youngster emerge stronger, healthier, generally hardier, and are more productive in the spring when compared to Spring-planted plants.

10 Herbs to Plant for Fall for Gardens & Containers

Sage

Hardy to zone 5, this perennial herb has you covered in all aspects: It’s a winner in the kitchen (say hello to this stuffing and fettuccine recipe) and is renowned for its health benefits. Whether you have a common cold, are suffering from stress or menopausal symptoms, Sage can come to the rescue! 

Another perk: Even if you have a slight “black thumb,” Sage varieties are forgiving and resilient. Plant your Sage in well-draining soil, keeping it in partial to full sun. If your Sage is in an outdoor container, water it 2-3 times weekly when the soil dries out.

[wps_products product_id=”4317115777105″ excludes=”description” show_featured_only=”true”]

Echinacea

Are you prepping for the cold and flu season? Do you want some beautiful springtime blossoms? That means that Echinacea (aka the coneflower) is perfect for you. Attractive pink petals complement the rusty red centers, attracting all kinds of pollinators in the spring. Oh, and the best part? A cup or two of Echinacea tea weekly can ward off infection.

These perennial herbs can survive in several different soil types, even rocky areas! The most important thing to keep in mind? They hate “wet feet.” Keep these beauties on the drier side in partial to full sun. If you’ve opted to confine your Echinacea to a container, make sure there’s enough room to accommodate the taproot (usually a 2-3 gallon pot).

[wps_products product_id=”4317112270929″ excludes=”description” show_featured_only=”true”]

Chives

If you live in a chilly region, Chives are for you! This perennial is hardy all the way to zone 3. As one of the most popular herbs, Chives probably don’t require much of an introduction: they taste great on everything, have alluring springtime pom-pom flowers, and are a nutrient-rich food (okay, that one might be a little surprising, right?).

Place your Chives in a location that receives full to partial sun and provide them with fertile, moist, well-draining soil. These plants can be grown in containers both inside and out; just make sure you place them on your sunniest windowsill!

[wps_products product_id=”4317111779409″ excludes=”description” show_featured_only=”true”]

Lilac Jelly

Use Lilac flowers, or any other type of strong-smelling edible blossom (like the Lavender shown here), to make this jelly! Its lightly floral taste pairs nicely with many things: add it to your cream cheese and bagel routine in the morning, or include it in a lemon drop martini at night. Either way, you won’t be disappointed.

If you’re looking for an overflowing container plant, this one’s for you. Lemon Balm tends to be invasive in the garden, so it’s perfect for pots! Plant your herb in well-draining, sandy loam, place it in your sunniest location, and allow the first inch or two to dry out between waterings.

[wps_products product_id=”4317113122897″ excludes=”description” show_featured_only=”true”]

Thyme

Thyme is a low-growing, shrubby herb that makes excellent garden edging. In the kitchen, thyme is an easy flavor-filled addition to just about anything: omelets, soups, chicken… you name it! Medicinally, the leaves, flowers, and oil are used to treat bronchitis and other conditions.

This perennial is hardy to zone 5 and should be planted in well-draining soil, placed in your sunniest spot, and watered when the first 2 inches of soil have dried.

[wps_products product_id=”4317116203089″ excludes=”description” show_featured_only=”true”]

Lavender

While you can’t expect any blossoms until the Spring, get a head start on next season by planting hardy Lavender varieties in the Fall! In the meantime, you can use Lavender leaves to make delicious treats (like these Lavender Lemon Bars) or make a simple Lavender tea to fight stress, anxiety, and insomnia.

These herbs are perennials and are hardy to zone 5. Plant your Lavendar in well-draining soil, keep it in your sunniest spot, and allow the soil of mature plants to dry out before rewatering. If you keep your Lavender in a container, make sure it’s large enough for its root system (2-3 gallons).

[wps_products product_id=”4317113647185″ excludes=”description” show_featured_only=”true”]

Greek Oregano

Similar to Thyme, Oregano is another low-grower that makes a beautiful frame for your taller plants. While blossoms are understated, Oregano’s flavor is impactful! Use this herb to flavor a fantastic marinara or create a Pistachio-Oregano pesto. Medicinally, Oregano is used to fight viral infections and can be used as a natural insecticide.

Oregano is hardy to zone 5. Like other Mediterranean herbs, they should be planted in well-draining soil in bright light; mature specimens should dry out before rewatering.

[wps_products product_id=”4317114368081″ excludes=”description” show_featured_only=”true”]

Marjoram

It’s not just Oregano’s cousin… we believe Marjoram has real value in the garden and pantry! Marjoram pairs beautifully with grilled beef and fish (nobody said to retire the grill after Labor Day!). In the medicine cabinet, the oil and leaves of Marjoram can fight muscle pain: simply add a few tablespoons of dried Marjoram to your bathwater. 

Marjoram is a perennial in warmer climates (to zone 7). Even if you live in a chillier area, Marjoram is a worthwhile annual herb to start in the Fall. Plant it in the container with well-draining soil and bring it to a sunny indoor location when temperatures spiral downward.

[wps_products product_id=”4317115351121″ excludes=”description” show_featured_only=”true”]

Parsley

The potential is endless with Parsley. As a wispy biennial, it’s fast-growing and makes a perfect container plant to have in a sunny location near the kitchen door. Whether you’re adding pizzazz to potatoes, sprucing up squash, or flavoring focaccia, Parsley is the herb for you!

[wps_products product_id=”4317114826833″ excludes=”description” show_featured_only=”true”]

Cilantro

You either love it, or you hate it… our vote is in Cilantro’s favor! The beginning of fall does not mean you have to give up delicious guacamole, chimichurri, and easy taco toppings. Your Cilantro plant will grow perfectly in a pot filled with well-draining soil that’s kept in a sunny spot.

[wps_products product_id=”4317111156817″ excludes=”description” show_featured_only=”true”]

Harvesting Herbs in the Fall

Harvesting Herbs in the Fall

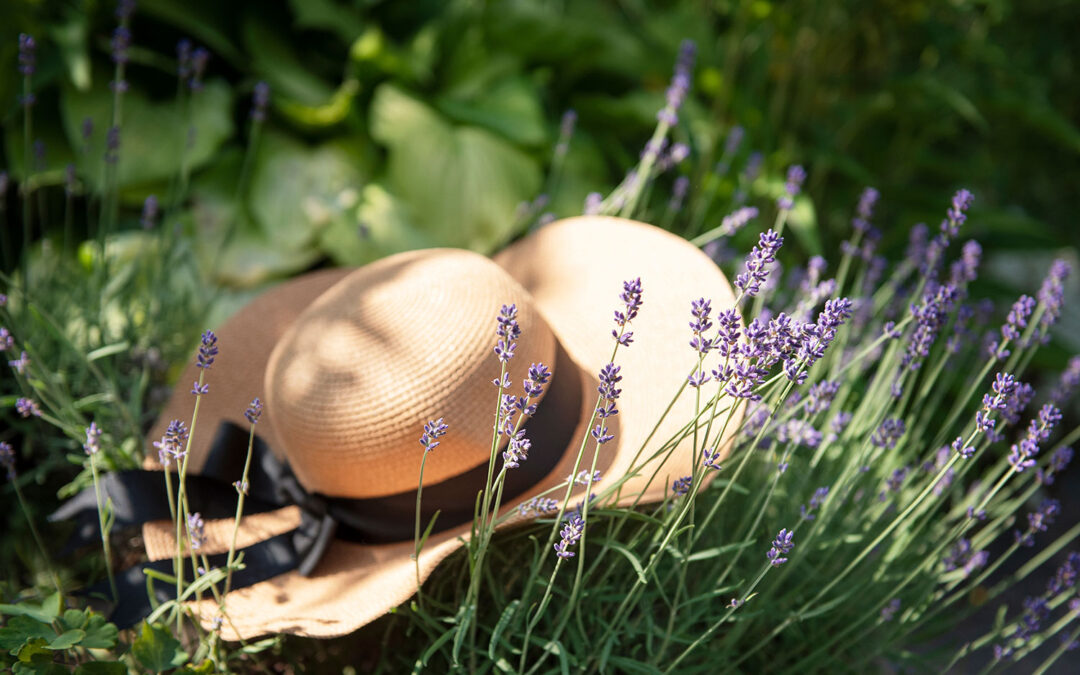
Herbs can add a whole new depth to your garden that you may not have had before. You can see how growing herbs can help you make your own herb blends and also how they can help you create new combinations that may have otherwise never come into your mind.

With fall right around the corner, far too many gardeners panic and make mistakes. Are you interested in learning how to harvest herbs in the fall without making common mistakes? Read our tips below to learn more about how you should handle the season when harvesting herbs in the fall.herbs-harvesting-fall

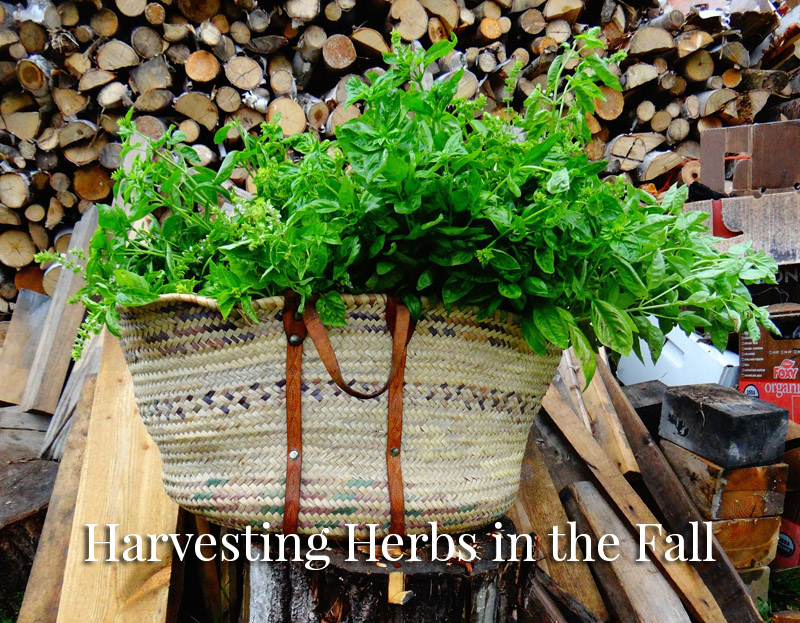
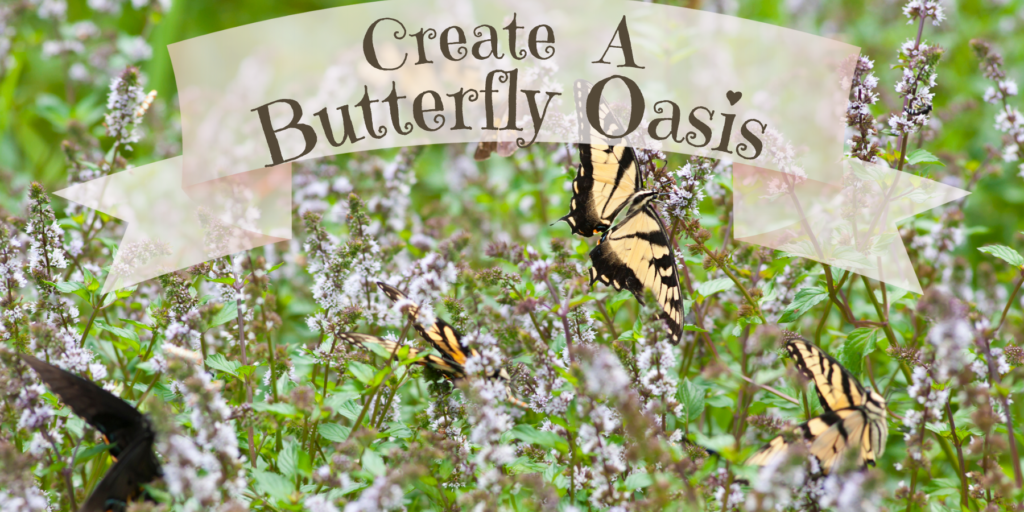
What Herbs To Harvest in the Fall

Before you dive in and start plucking herbs, you should pay attention to your selection. The timing for harvesting herbs is dependent on what type of plant they are, and other factors. For example, certain culinary herbs such as oregano may be more sensitive to dropping temperatures.

Many herbs will last up to four weeks, some up to six. As fall approaches, you should focus on harvesting the less-thirsty herbs first.

If you are looking for extra-long-lasting herbs, it is best to harvest in the fall, because they will last until spring. It is also important to note that herbs will not last as long if they are picked wet.

You must harvest herbs in the appropriate season to ensure that they are harvested at their peak. Keep in mind the fact that herbs that are starting to lose their flavor before harvest will take on a bitter taste when you cook them. Retain these herbs on your herbs table and harvest them as they dry out. You can also cut these herbs when they are already overgrown.

herbs-drying

Tips for Harvesting & Preserving Your Herbs

  • When harvesting herbs for immediate use there are a few rules to keep in mind. For single-stemmed herb plants such as basil and savory, only pick the center tip. This encourages bushy growth. Use the tops and flower buds of chervil, thyme, and mint. Use the outside leaves and stalks of your parsley plant and leave the center alone.
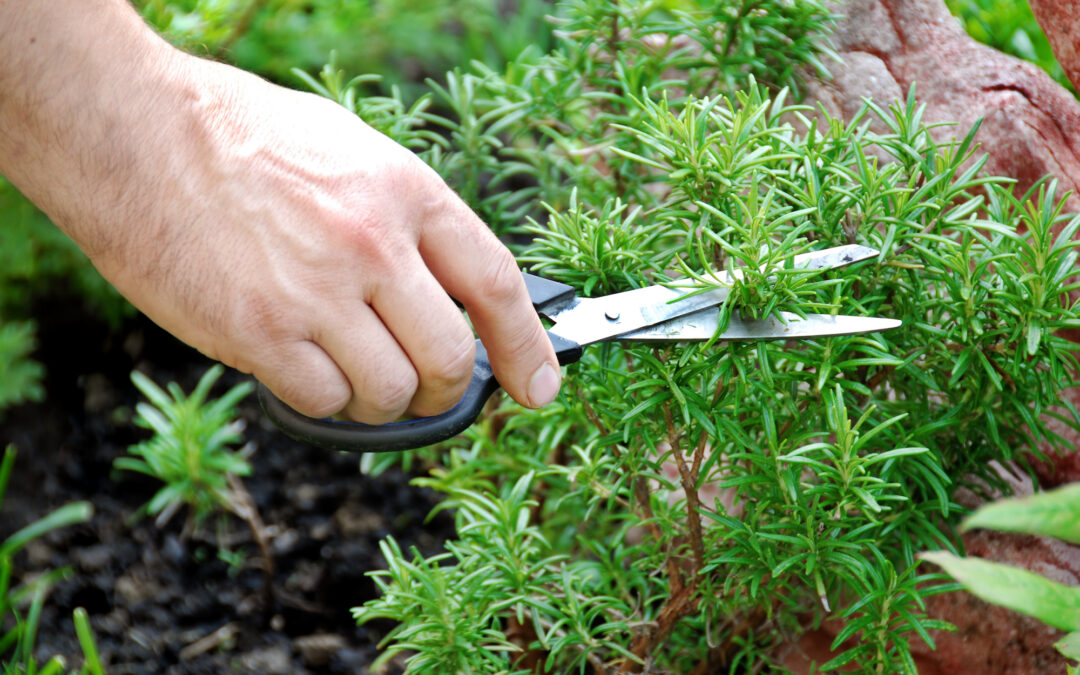
  • A major harvest requires a bit of work, but the rewards throughout the year are well worth the effort. You can get 2-3 major cuts from both annual and perennial herbs before the end of the season. The last harvest should be in early fall in order to give the new growth a chance to harden off before the first frost.
  • Choose a bright, sunny morning just after the dew has evaporated but before the sun gets hot enough to affect the oil content in the leaves and flowers. Take care in picking and use only healthy plants. Perennial herbs can be cut back by a third, while annuals can be cut to within three inches of the soil surface.
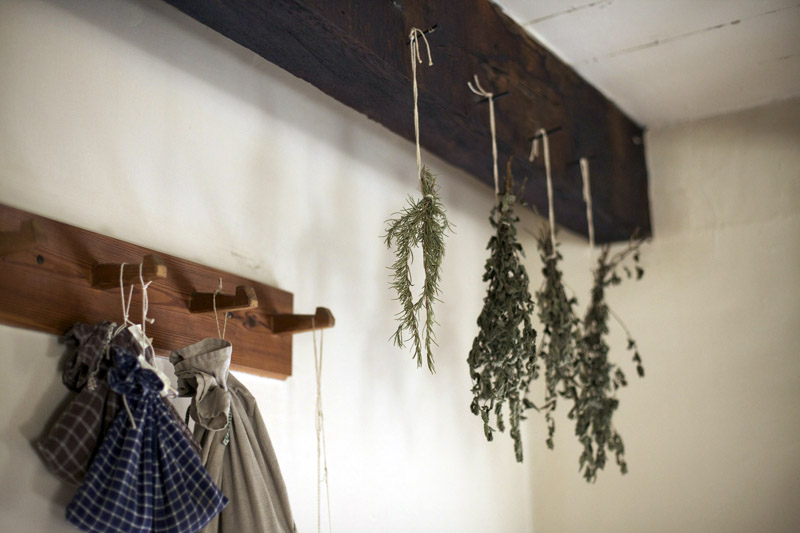
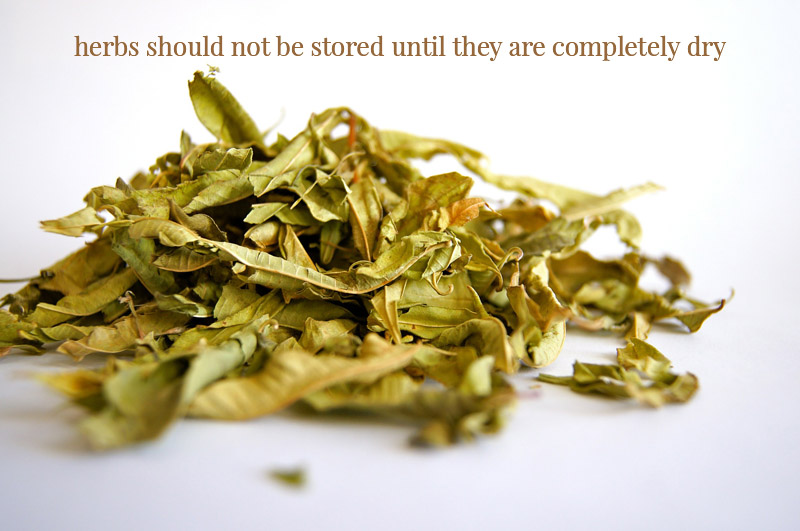
  • Rinse the fresh-cut herbs in cool water and use towels to absorb excess moisture. Tie the stems together (dental floss works well) in bundles of five or six and hang in a dry, well-ventilated spot, away from direct sun and moisture. The temperature should be no more than 85 degrees. Since herbs should not be stored until they are completely dry it is important to test them by placing a stem in an airtight container overnight. If condensation forms, more drying is needed.
  • Once the plants are dry, store them in clean, airtight containers (glass containers are best) and keep away from direct sunlight. Herbs lose their potency over time, so we suggest keeping them for a maximum period of one year. 

herbs-completely-dry

Get Ready for Winter

Many herbs will bloom during the summer months, but when the temperatures start to drop, the majority of them will begin to die. During the fall months, herbs should all be harvested and dried if you want to preserve them. Check the weather forecast and get the herbs dried off as soon as you can. This will help prevent them from freezing and dying in the cold.

Make sure you’ve harvested your herbs before they’re dried out. Just because the leaves are wilted, don’t just leave them on the plants. Harvesting herbs is much quicker if they’re dried completely.

So be sure to harvest the herbs and store them away as soon as possible. Herb gardening experts say green herbs such as basil, chives, and parsley should not be harvested until they’re completely dry. Similar to preparing your soil, choosing which herbs to harvest can impact the rest of your garden and the season as a whole.

Protect Your Herb Plants for Winter

Keep in mind that there’s only so much protection a pot of herbs can receive before the fall weather creeps in, leading to frosty conditions. Make sure to cover your plants up well before the temperature drops below 40 degrees.

It’s also good to keep a close eye on them when possible. See if they are drooping a lot, and protect the plants from your pets or kids by pinching off any extra stems. When cooking with herbs, there is usually a tight window where flavors are optimal.

The leaves on most herbs will be poisonous, but if you cut them off, then all you’re doing is removing the bitter end. Harvest in the right way when fall approaches. A lot of people will overlook how to harvest their herbs, especially when it’s time to bring them inside for the winter. There are some tricks to taking care of your herbs, though.

Harvest Herbs for Their Seeds

When you are planning to harvest your herbs for seeds, there are some considerations to keep in mind. Harvest herbs close to the time they will be harvested. If the herb has fallen off its seedhead by the time you harvest it, you will need to wait for it to fall over before harvesting the seeds.

Start by selecting and gathering your herbs. Remember, you will be collecting the seeds of your herbs for further propagation.

What type of herbs should you start collecting seeds from? When it comes to bushes, we like harvesting herbs such as oregano, mint, lemon balm, cilantro, and rosemary for their seeds.​​

A Few More Tips for Harvesting Herbs in the Fall

There are a few technical approaches you can use to harvest your herbs. Many people harvest their herbs by the stems. If you want to harvest herbs by the stem, you will want to use your garden shears or small snips. Snipping off the branches that are stem tips will produce smaller amounts of herbs. By using shears, the stems should be fully clipped, and you will be left with lots of leaves on the stems.

If you want to harvest herbs for their flowers, you can do the same as above, but you’ll need a few different types of tools to do it. Of course, if you want to go the organic route, you can always use your hands.

When using herb snips or shears, you will want to go around the entire plant first. Try to do it in sections. If you do it this way, you’ll be left with lots of leaves on the plant. With this approach, the leaves will be healthy, and they will continue to provide you with a full, vibrant, harvest for the rest of your autumn gardening.

Enjoy the Fall With Your Herbs

That does it for this piece. We hope that we have helped you learn a bit more about harvesting herbs in the fall. As you can see, you do not need to fear new seasons in the garden, as they present new opportunities for your herbs and plants.

To learn more about our approach to our herbs and our business, check out our FAQ page.

[wps_products collection="Culinary Herb Plants" items_per_row="6" title_color="#6BBEE7" show_featured_only="true"]
7 Common Herb Gardening Mistakes & How to Avoid Them

7 Common Herb Gardening Mistakes & How to Avoid Them

There’s something special about starting your own herb garden and watching the plants grow and flourish. It gives you a feeling of accomplishment and can replace store-bought ingredients in your favorite recipes. 

However, growing herbs in indoor and outdoor gardens can also be tricky. You need to know what you’re doing, or you could end up killing your herbs by mistake. 

If you’re looking to learn how to grow herbs the right way, this guide is for you. Let’s dive into a few common herb gardening mistakes and how to avoid them.

1. Growing Your Herbs from Seed

One of the biggest mistakes that homeowners and renters wanting to start their own herb garden make is to try growing herbs from seed. While it’s fun to watch herbs grow, it’s also a lot more difficult to succeed. 

On top of that, seeds typically cost the same amount as starter herbs. That means that you can start growing herbs from a healthy foundation without running the risk of your seeds not sprouting at all. 

2. Choosing Complex Herbs

If you’re just getting started with herb gardening, it’s best not to try to grow herbs that are particularly difficult. Instead, ease your way into herb gardening and start with plants that are more forgiving. 

For example, the herb basil is a fairly resilient plant and doesn’t require as much regular herb maintenance as other plants. That makes it a great choice if you’re new to the herb gardening scene.

[wps_products product_id="4317110206545" excludes="description" show_featured_only="true"]
[wps_products product_id="4317110501457" excludes="description" show_featured_only="true"]
[wps_products product_id="4317110566993" excludes="description" show_featured_only="true"]

3. Not Knowing the Different Types of Herbs

What many new herb gardeners don’t realize is that there are many different varieties of each type of herb. And each variety has a slightly different flavor profile connected to it. 

When getting started with herb gardening, you should make sure that you’re checking what variety of herb you’re getting. For instance, spearmint is very different from apple mint and can’t be used for the same recipes. 

[wps_products product_id="4752833839185" excludes="description" show_featured_only="true"]

4. Not Maintaining Your Soil

The soil that you use has a huge impact on your garden and the health of the plants you grow. That’s because the soil is what contains the nutrients that plants feed off of and use to grow. 

If you are using soil that hasn’t been worked to turn over fresh soil or that doesn’t have compost and nutrients added to it, it won’t be able to support your herbs. This can cause the plants to wilt and grow weak. 

When gardening with herbs, make sure to use potting soil with fertilizer to help you keep your plants healthy. This will make sure that your herbs are able to get the most out of the soil you’re feeding them. 

5. Not Planting Complementary Herbs

While most herbs taste great in our meals, not all of them are a good choice for planting with other herbs. That’s because they’re fast and aggressive growers which can cause them to take over space and nutrients from neighboring herbs. 

One of our top tips for indoor herb gardens is to make sure that you separate out voracious plants. For instance, mint and oregano should be planted in pots and kept separate from the rest of your garden. Otherwise, they could take over!

Before rushing out to purchase a plethora of herbs, be sure to check out which herbs will go well together and which should be separated. This will help you avoid an issue once your herb garden is already in full swing!

[wps_products product_id="4317114269777" excludes="description" show_featured_only="true"]

6. Watering Herbs Incorrectly

Many people who are new to herb gardening don’t realize that they need to be treated differently than your standard house plants. And that includes the way that you water them!

For instance, most herbs require regular yet moderate watering. This is especially true during hotter and drier summer months when they can dry out and wither. 

It also goes the other way too. Herbs that don’t have enough drainage can end up drowning in heavy rainfalls or overwatering them. If you’re growing herbs indoors, make sure that the pots you select have enough drainage to enable the plant to breathe.

7. Not Pruning the Plants

Pruning is just for trees, right? Wrong! As an herb gardener, you should be regularly pruning your plants to make sure that they’re growing healthily. 

The way to do this is to start trimming your plant once it rises to about 4 inches above the soil. Make sure you leave some leaves behind and then trim the plant so that you can keep it growing freshly. 

As you begin pruning more regularly, you’ll start to notice that your plants produce more herbs when you practice trimming them. They actually become happier and healthier plants and begin to yield more products for you to use. 

Finally, it also helps contain the plant. When herbs are left to their own devices, they can grow long, tall, or unruly. When plants are properly pruned, they are kept more confined and are a much tidier way to enjoy your favorite herbs. 

Avoid Common Herb Gardening Mistakes

With this handy guide for growing herbs, you’ll be able to avoid common herb gardening mistakes and make sure you’re producing healthy plants. Pretty soon, you’ll be adding homegrown parsley to your favorite soups and salads!

Ready to get started growing herbs in your own home? Join a network of home chefs and happy gardeners at The Herb Exchange and call our team to get the herbs you need today!

Falling in Love with Fall Herbs: Which to Pick & What to Do with Them

Falling in Love with Fall Herbs: Which to Pick & What to Do with Them

It’s officially (almost) over. It’s time to say goodbye to the summer garden, which is probably looking a little raggedy by now. But, don’t despair… the fun isn’t over yet! Now it’s time to select new, cool-weather-loving herbs to spice up your kitchen table. Which ones should you choose? What can you do with them? Is it just Pumpkin-Spice-lattes from here on out?

Why the Transition?

Your herbs have a life expectancy, and for many, they’ve reached the end of their rope. Why? Extreme heat and bolting will cause your favorite summer herbs to become bitter and even change their texture! July and August is the perfect time to give up the fight and call it quits on your annual and biennial plants, replacing the old with the new.

Which to Pick

Just as some herbs are summer-lovers, others are cool-weather-thrivers. Remember some of your favorite springtime herbs? Many of them are making an autumn comeback! Looking for a few suggestions?

  • Parsley
  • Cilantro
  • Chervil
  • Lovage
  • Arugula
  • Dill

What to Do with Them (& How to Love Them)

The good news: You aren’t condemned to a life full of pumpkin spice (if that’s not your thing). You can still enjoy summer-fresh flavors in the fall!

Parsley 

How to Love

Parsley needs 4-6 hours of direct sun each day, so plant your herb in an area that receives partial sun. Placing established plants in the ground will give you a much faster turn-around for usable amounts of foliage. Another bonus? Parsley grown in the fall produces more abundantly than springtime plants!

How to Use

Flat Parsley

If Flat and Curled Parsley were in a flavor fight, Flat Parsley would win because it has the most robust flavor. Its perky, bright, slightly bitter taste compliments many fall favorites: including this Parmesan & Parsley Roasted Butternut Squash. And, no, just because autumn is approaching doesn’t mean you have to say goodbye to pesto. Just make it out of Parsley!

Curled Parsley

Although it’s milder, Curled Parsley shouldn’t be overlooked. Its fresh flavor and charming foliage can make for an attractive garnish or take center stage in this Tabbouleh Recipe! Its soft, aromatic taste perfectly complements the punchier mint, which transforms into a lip-smacking treat with the addition of cucumber and lemon juice. (Please tell us you brought some lamb chops!)

[wps_products product_id="4317114761297" excludes="description" show_featured_only="true"]
[wps_products product_id="4317114826833" excludes="description" show_featured_only="true"]

Cilantro

How to Love

Cilantro loves cool weather and shorter days! If temperatures have cooled off in your area, place your plant in the full sun. For container gardens, make sure you plant your Cilantro in well-draining soil, adding extra perlite to the mix. These herbs do not require frequent fertilizing, but if their leaves start to yellow (and you’re confident you’re not overwatering), give them a nutrient boost.

How to Use

Thanks to Cilantro’s cool-weather-loving abilities, your “Taco Tuesday” tradition will still be going strong in the autumn. Looking for a new idea to “spice” things up? Give these tantalizing Garlic Cilantro Shrimp Tacos a try!

[wps_products product_id="4317111156817" excludes="description" show_featured_only="true"]

Chervil

How to Love

If you live in an extra-cool area (maintaining temperatures of 65 degrees), your plant will enjoy partial sun. However, if your daytime temperatures regularly rise above that, your herb should be in shaded conditions. Chervil enjoys staying evenly moist, so water when the first ½ inch of soil is dry. If you’re considering a container garden, Chervil is a perfect candidate for a self-watering pot (unlike many Mediterannean herbs).

How to Use

Chervil doesn’t get the attention it deserves! This delightful herb has delicate hints of licorice and anise; and is often compared to fennel, parsley, and tarragon. Never tried it? Now’s your chance! Welcome in soup season with this lovely Creamy Potato & Chervil Soup, teeming with bright, creamy freshness. This underutilized herb is also one of the four components in “Fines Herbes,” a classic French herb mixture (also including Parsley, Tarragon, and Chives) that is delicious on eggs, fish, chicken… and probably anything else you can think of!

[wps_products product_id="4317111681105" excludes="description" show_featured_only="true"]

Lovage

How to Love

Lovage enjoys sandy, well-draining soil that is kept constantly moist! If the soil dries out, the leaves will taste bitter. For in-ground gardens, layer mulch, peat moss, or another type of ground cover to maintain moisture. For container gardens, select a large pot to accommodate this plant’s bigger-than-expected root system. They are wonderful candidates for self-watering containers! 

How to Use

Do you love Lovage? Or is it new to you? Its flavor is somewhere between celery, parsley, anise, and mint… really, you just need to experience it for yourself! Venture on the sweet side with this addictive Lovage Icecream or enter “team saucy” with a Lovage Vinaigrette to make boring salads spectacular again!

[wps_products product_id="4317114499153" excludes="description" show_featured_only="true"]

Arugula

How to Love

Arugula requires 6 or more hours of direct sunlight, so plant it in a sunny location! While it prefers well-draining soil, it’s resilient and can usually tolerate less-than-perfect conditions. Maintain even moisture throughout the soil, especially if warm temperatures persist.

How to Use

Who doesn’t love the peppery leaves of Arugula, coupled with their crispy leaf texture? And no, in case you’re wondering, you don’t always have to make a salad. (Although, we suggest you do… they’re absolutely delicious!) Change up your Arugula routine by making this Three-Cheese Arugula Naan Pizza! Some extra perks? You can use premade Naan as the crust, making this a no-brainer mid-week meal that will have everyone smiling!  

[wps_products product_id="4317109944401" excludes="description" show_featured_only="true"]
[wps_products product_id="6583808753745" excludes="description" show_featured_only="true"]

Dill

How to Love

Plant your Dill in well-draining soil and place it in an area that receives full sun. Since this herb can become top-heavy as it matures, plant it in an area that receives (at least) some protection from harsh winds.

How to Use

Calling all you pickle makers out there! Whether you make your own Dill Pickles or not, you can still take part in this scrumptious Creamy Dill Pickle Salad, which is bursting with sprigs of fresh Dill from your garden.  Looking for something a little less “pickle-y”? These Braised Lemon Chicken Thighs with Dill and Turmeric might be right up your alley! 

With a few tips and recipes under your belt, we trust you are falling in love with fall herbs. Now head over to the shop and grab your favorites before it’s too late!

[wps_products product_id="4317111582801" excludes="description" show_featured_only="true"]
[wps_products product_id="6583803871313" excludes="description" show_featured_only="true"]
Get Your Shears Ready: Why, When, and How to Prune Your Lavender

Get Your Shears Ready: Why, When, and How to Prune Your Lavender

It’s a fact: Life is lovelier with Lavender. It enhances our food with aromatic flavor, gives the air a sweet summertime scent, and feeds our favorite pollinators! But now’s the time for you to give back to your Lavender plant with a bit of TLC. Why, when, and how should you prune your Lavender?

The “Why”

Lavender is affectionately known as a “sub-shrub” or “semi-shrub.” Why? It can’t decide whether it’s a flexible herb or a woody bush.  You’ve probably already noticed your plant’s anatomy: old growth becomes hard and barky, while new growth is soft and supple. If you fail to prune your plant’s new growth, more and more of your plant will become woody.

You might be wondering: What’s the big deal about that? Woody portions of your Lavender plant are much more brittle, susceptible to frost, prone to rot and disease. Plus, they produce fewer leaves and flowers, making for an aesthetically “bald” Lavender plant. Not so great, right?

The “When”

For the most devoted Lavender parents, it’s recommended that you prune your plant in the Early Spring and Late Summer.

A Spring pruning consists mainly of “clean-up” from damage your plant experienced over the winter months. It’s worth noting: this early pruning can result in delayed flowering.

The Late Summer pruning is the most thorough! Wait until your Lavender plant has finished its flowering cycle. If you live in an area that experiences early frosts, put your pruning on the priority list for August. Waiting can result in frost damage. If you’re in a warmer climate, you can prune as late as early September.

The “How to”

The extent of your pruning project will depend on your variety of Lavender and its age. Extensive pruning is reserved for established plants that are at least 2 years old. Youngsters benefit from regular “pinching.”

The Basics of Lavender Pruning

Pinching Young Lavender Plants

When your little Lavender develops new tips, pinch them off. Why? This will encourage your plant to create more branches, making it bushier over time. Early pinching also gives you some control over your Lavender’s shape and size; waiting to shape your plant until it’s woody is a big mistake! 

Pruning Established Plants

So, this is going to sound like a lot. Are you ready? You will prune off ⅓ of your Lavender. Bad at math? Thankfully, these herbs are pretty forgiving. If you’re off by a little bit, you can still expect your plant to bounce back. However, pruning ½ your plant or more usually puts you in the danger zone! 

  1. Get your clean pruning shears ready!
  2. Take a few steps back, eyeballing your plant.
  3. Cut a ⅓ of a stem.
  4. If you’re a nervous first-timer, you can use your first cut stem as a “measuring stick,” cutting other stems to the same length.
  5. Have fun with it: this is your chance to shape your Lavender plant! 

Just a reminder: You should prune your Lavender (at least) 2-3 inches above the woody stem. Why? Pruned wooden branches will not produce new growth. You’ll just be stuck with an ugly twig. (Don’t say we didn’t warn you!)

Pruning Old Lavender Plants

Are you trying to get your Grandma or Grandpa Lavender to look healthy and lush again? You should continue pruning your plants, even when they become “extra established” (aka old). To encourage new growth and minimize their woodiness, stretch your normal pruning limits. Prune branches 2 inches above the woody sections. Doing so will give your plant its best chance to make new, healthy growth. And, remember, we’re here for you when you’re ready for your next generation of Lavender.

Pruning Reminders for Specific Species

Not all Lavender is the same: some are hardier than others, and some have different growth habits! So here’s a look at some of the specific Lavender varieties we offer:

Lavender ‘Hidcote’ & ‘Munstead’ & ‘Rosea Jean Davis’

These three are all English Lavender varieties, with a compact, low-profile growing habit. The ‘Rosea Jean Davis’ gets a special mention: It sports pretty pink flowers! Expect blooms in the late Spring or early Summer. Once the flowers are exhausted, dead-heading will encourage your plant to bloom again! Wait until late August for extensive pruning.

[wps_products product_id="4317113679953" excludes="description" show_featured_only="true"]
[wps_products product_id="4317112991825" excludes="description" show_featured_only="true"]
[wps_products product_id="6589390356561" excludes="description" show_featured_only="true"]

Lavender ‘Grosso’ & ‘Provence’

What do you get when you combine English Lavender with Spike Lavender? You guessed it: these two varieties! They have longer branches, flower stems, and flower spikes that grow from the plant’s center. Lavender ‘Grosso’ and ‘Provence’ have a long blooming period, through early-late Summer. Once it’s over, get ready for your August pruning! Since these plants have such long stems, you can chop as much as ½ of your plant!

[wps_products product_id="4317113122897" excludes="description" show_featured_only="true"]
[wps_products product_id="4317113319505" excludes="description" show_featured_only="true"]

Lavender ‘Goodwin Creek Grey’

While most Lavender is renowned for its beautiful blooms, this one is known for its attractive, silver-grey foliage! Its flower spikes are shorter and smaller than other varieties. Still, they are a unique deep blue-violet color, giving this plant an unexpected pop. As a hybrid, it was bred to withstand higher heat and humidity, making it a hardy variety. Follow the pruning instructions in the “How to” section to maintain your plant’s size!

[wps_products product_id="4317113417809" excludes="description" show_featured_only="true"]

Lavender ‘Phenomenal’

This is the lovechild of English and Portuguese Lavender: giving it excellent cold tolerance and a remarkably long blooming time! Blossoms begin around June and last until Fall. If you live in an extra chilly climate, you should do your “major” pruning in the early spring before flowering begins. Why? Your plant will enter winter in ‘one piece,’ without any vulnerable wounds. Extra perks? Since this variety is a late bloomer, Spring pruning won’t interfere with your flowering season. You will also get to enjoy those blossoms as long as possible!

[wps_products product_id="4317113647185" excludes="description" show_featured_only="true"]

Lavender ‘French’ & Lavender ‘Silver Anouk’

Expect early spring blooms, with a compact shape, crowned with fully open blossoms. French Lavenders and Spanish Lavenders are the least hearty of the bunch, so treat them tenderly! Deadhead after its first flowering: taking care not to trim too close to the plant’s base. Hopefully, it will reward you with a second round of blooms.

[wps_products product_id="6585496502353" excludes="description" show_featured_only="true"]
[wps_products product_id="4317113516113" excludes="description" show_featured_only="true"]