by Kenan White | Sep 16, 2013 | Gardening, Herbs, Seeds |

I am a Road Warrior! Before your mental image focuses, let me qualify that with the word “gardening”. So, what I really am is a Gardening Road Warrior. Let me explain that I am not zipping down the road at blinding speeds. No I am the one standing in the roadside weeds while cars and trucks of all kinds hurdle past me in their rush to get somewhere. The warrior part comes from the fact that one must be somewhat brave to be out here on the side of the highway. Safety aside, it looks, and feels a little weird too.
If not a warrior, then maybe I can be a hunter and gatherer? That is exactly what I am doing! I am out here on the side of the highway hunting for dried wildflowers so that I may gather their seeds. I have always been a traditional type of gardener, and feel this activity really reaches back to the roots of gardening. Having something I want as bad as the seeds I am hunting, gives the activity real meaning. When harvesting seeds, I am so intent upon my mission that I often forget it takes place on the roadside. Seeds are more about what they are going to be than just the seeds themselves.
Collecting wildflowers seeds, I image what would happen if I sowed them all this way or that. Creating visions of color that change with the season. A meadow in bloom or the Spring Prairie, with enough seed and a little land anything is possible. The small bags of seed I collect can plant acres of land, how such a small amount can create so much is one of the great mysteries we will never unfold. But as long as we know how, we need never know why seeds do as they do. All we need know are the few small requirements each seed needs to release their magic in the world. Is there anything else that says, “Just add water,” and will grow the Garden of Eden?
Yes, seeds are magic. And I can share in that magic. When possibilities are boundless, I can be a Road Warrior, or a hunter-gatherer, or prompt into reality a beautiful vision, or anything I want to be. As long as I do it in the garden, where just about anything is possible.
by Kenan White | Sep 6, 2013 | Seeds |

Saving Seeds for the Future
Many herb gardeners prevent their plants from producing seeds by removing flowers. It is well known that doing this will increase the potency of herbs harvested at The Growers Exchange. We see this all the time, as we allow all of our garden herbs to go to seed. When the plants begin to make seeds, they do not put much effort into anything else, such as growing new foliage. Plants usually end their season looking pretty haggard. They are worn out; existing foliage is by now old and has suffered the ravages of weather and summer sun. But standing proud and dried above it is the product of its efforts; a bunch of seeds ready, willing and able to make a whole lot of new plants. There is value and intrigue in that seed head.
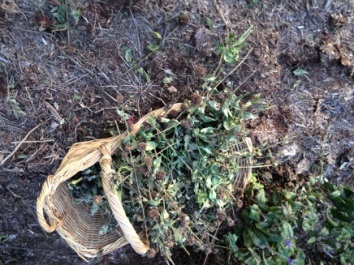
To begin, let me explain that I am a seed collector, I am the one seen by the roadside, bucket in hand thrashing through the weeds. And yes, people do sometimes stop and ask if I need help? Am I lost? Or confused? And of course I have been asked for ID by sheriffs, deputies, police, and state troopers. But, they all leave me as they found me in the weeds, shaking their heads and muttering about how “it takes all kinds”.
Learning to Collect Seeds
But they don’t know what I know! There is treasure is those weeds! Every gardener knows that seeds are expensive. With a little planning, seeds fresher than any you can buy are there for the taking. I divide my collecting into wild seeds and garden seeds. All the roadside adventure happens while collecting wild seeds, but I want to explain how I collect herb seeds from my garden.
As a commercial grower of herb plants, our biggest unknown is obtaining viable herb seed. Seeds are alive even though they don’t look it. They lose viability with age; this is a process some of us gardeners are familiar with. To hedge, we harvest seeds as well as buy them, hoping for good germination, but having to wait weeks to know. Seeds freshly collected usually germinate near 100%, they are worth the effort of collecting and cleaning. The nursery office is surrounded by our Growers Exchange herb garden, where we grow all the herb plants we sell. Our garden is invaluable to the greenhouse, often providing seeds or seedlings when not available anywhere. The herb garden also allows us to be familiar with the plants through their lifecycle. We can be of more help to customers when we are growing herb in a garden just like them. Many customers’ questions have been answered by someone first going outside to see what our plants are doing.
Collecting Herb Seeds
Collecting seeds is easy! All you need is a bucket and a willingness to grab hold of bunches of dried plant. The most important thing is understanding the nature of the seed being collected. Once the seed head is dried, each has unique characteristics just like the flowers they once were. Look at the seed head and determine how they are going to fall when you begin. Some pods are like little pitchers, waiting to pour their contents; others, the seeds are the head and they must be removed from a center cone. The nature of the problem is mechanical, not horticultural. In other words, common sense will lead you to a successful harvest.
Fall is here and now is the perfect time to start seed collecting! Seed collecting saves money, and is the most economical way to reap new plants for your garden year after year. Many gardeners also enjoy sharing their favorite seeds with friends. Don’t be afraid to get your hands dirty when collecting herb seeds – you’re bound to be rewarded with surprises.
When to Collect Herb Seeds
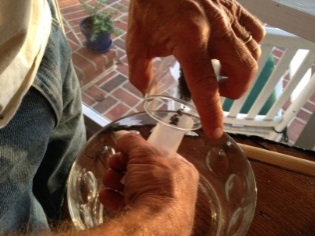
The method I use, to collect seeds, is to set the bucket on the ground and bend the seed heads over the bucket. It is important that the heads be over the bucket when tipped, as the seeds may just fall out. Some seed heads need to be crushed and some rolled between your hands. Just do it over the bucket so it all falls in. Annuals are some of the best and most pervasive plants to produce from home-saved seed, but bulbs, perennials and even some shrubs and trees can be equally gratifying. Be prepared for some variation in seedlings, especially if collecting from F1 hybrids which are special varieties bred by the seed companies for consistency and robustness; the seedlings produced by these plants are not likely to have the same properties as the parent plant. However, the different characteristics may be good ones and it makes the whole process more exhilarating!
It’s not always obvious when seeds are ready. The correct time to collect seeds from their fruits may differ from the time they are ready to eat. Some seeds are very straightforward and basically require storing until they’re ready for sowing, either into pots under cover or directly outside. Others, however, may be a little tricky and require preparation before they’ll germinate, such as exposure to certain temperatures, soaking, or breaking the seed coat. Seed pods and seed heads will usually dry out when they’re ready for collection, becoming straw-pale and papery. If you want to hold on to a few of these plants to produce seeds for next year you’ll actively want them to ‘bolt’, or run to seed. Of course, a lot of seed collection is commonsense. Just think about what would happen in nature when seeds are ripe and aim to copy that.
How to Collect Herb Seeds
- Choose a dry, windless day. Select a healthy, pest- and disease-free plant, whose seedpods appear as if they are about to split. Remove the entire seed head.
- Invert the entire seed head upside-down into a paper bag. Close bag without crushing the seed head and label. Place bag in a dry place for the seeds to ripen.
- Check the seeds’ progress regularly. When most of the seedpods have opened, remove the contents onto a dry surface and separate seeds from any bits of seed head still attached.
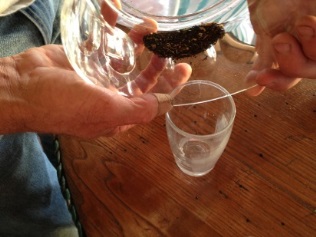
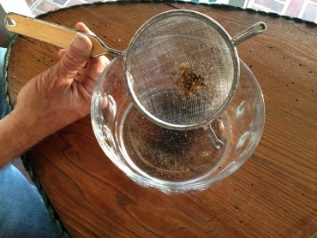
- Extracted seeds will need to be properly cleaned before storing to remove any remaining debris. Dried seeds can be sorted from its chaff by shaking the whole lot through a series of graded sieves/screens. Stack the sieves with the largest mesh size on top and smallest at the bottom, tip the seeds in and shake. One of the sieves will be just the right size to collect the majority of the seeds, leaving the chaff behind in the remaining sieves.
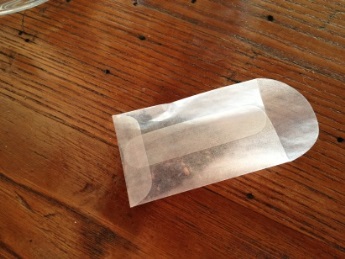
- Store the cleaned seed in a small dry envelope, seal and label carefully. Keep in a cool, dry, airy place until ready to be used. If kept in an air-tight container and placed in the refrigerator, these seeds will be good for at least six years.
Cleaning Herb Seeds
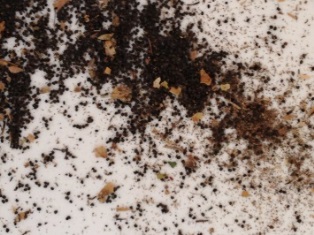
Cleaning seeds is not too difficult. If a seed sieve is not available, raid the kitchen for one and grab the colander too. The large trash can be removed from the bucket by hand; leaves, stems, etc. The mess at the bottom is a mix of powdered dried plant and the seeds. Use various size screens to separate the two. In one of your screens you will find clean seed, the treasure you seek! These seeds should be stored in paper envelopes inside where temperature and humidity are controlled. Never, ever, ever store them in plastic or the refrigerator; one rots them the other dies them out.
You will have way more seeds than you will need. So, you should indulge in the gardener’s practice of sharing the bounty with fellow gardeners. Giving away flowers and veggies is great. But when you stop to consider the gift of seeds, you realize it is a gift of possibilities. And even though it has been said many times, when messing with seeds, think about what the Navaho say. The simple statement that creates endless possibilities: “See This Seed, It is Not a Simple Thing”. Think about what a seed looks like and what it is capable of and you will see that messing with seeds is messing with one of the great mysteries of life. Is there any wonder as to why we garden?

by Kenan White | Jan 24, 2013 | Gardening, Growing, Herbs, Life on the Farm, Seeds |
The Delta-T heating system we purchased will deliver heat where it matters most to plant development, the root zone. Everyone knows that a healthy plant must have a healthy root system. To insure all Growers Exchange herb plants fill their pot with vigorous roots, we will keep soil temperatures at 65 degrees to stimulate rapid root development.
To keep the green plant tops from growing too quickly, the air temperature in the greenhouse will be at 50 degrees at night. Growth is slower at cooler temperatures so the stems are thicker and stronger. The stem length between nodes is shortened, creating a symmetrical plant.
Bottom heat will also allow us to propagate more plants from cuttings. Many herbs like rosemary, lavender, and mint are best increased by vegetative propagation, also known as cloning. A mist system keeps the non-rooted plant stems hydrated until the warm soil promotes root growth. In about a month a new plant is ready to be re-potted.
Tropical herb plants like Lemon Verbena, Lemon Grass, Vietnamese Coriander, Dill, and Basil will also benefit from the new bottom heat. Try as we do, some days we can only keep the greenhouse but so warm. Wood fired space heaters warm the greenhouse air; but some winter days only so much heat is possible. We could also consider stone flooring that promotes underfloor heating and is able to retain heat well, allowing the plants to stay warm even when it’s cold outside. The bottom heat system, however, will act as a great attachment to the other options ensuring that our plants stay in their optimal temperature zones. Now we will be able to keep the root zone of these tropical herbs at their desired 65 degrees no matter what is happening outside.
As greenhouse growers, this new bottom heat is as exciting as Christmas! We will have plenty of herb plants ready for spring planting. The bottom heat helps the seedlings prepare for Spring. Winter is the best time to plan your herb garden. Don’t forget to order early, many herb plants are grown in limited quantity. And a tip from a greenhouse grower: have plants sent as early as your planting zone allows.


by Kenan White | Jan 17, 2013 | Basics, Gardening, Growing, Herbs, Seeds |
The Growers Exchange greenhouse staff is busy starting all the herb plants needed for our customer’s gardens this spring. Different plants are started by 3 different methods. Annual, biennial, and some perennial are easy to grow from seed. Basil, cilantro, arugala are examples of some herbs that grow quickly from seed. Italian parsley is slow, up to 3 weeks to germinate and another 4 weeks to grow to transplant size. This herb takes a long time grow from a seed, but there is no other way to obtain new plants. Anise Hyssop, Catnip, and Bergamot are examples of perennial herb plants that may take several weeks to germinate, but are still considered easy to grow from seed. A germination chamber is used to force seeds to sprout before their designated time; parsley goes from 21 to 5 days in the chamber. Seed flats must be taken out immediately after germination, as seedlings quickly die in the high humidity. Technically germination begins with the emergence of the radical. This is the first little white shoot tip to penetrate the seed shell, then germination is over and seedling growth begins. It doesn’t sound like much, if you think about it; emergence of the radical is one of the magic moments in nature. No one can fully explain or replicate a hard little thing that turns into a plant when water is added. Sowing seeds does leave the mind time to wander. And wonder!
Herbs that grow as a shrub, such as rosemary, lavender, and germander could be grown from seed, but would not produce a transplant for 1 or 2 years. To avoid the long seedling stage, Stem cuttings are kept under mist and have a heat source below keeping the root zone warm. The stems soon grow roots and a miniature version of the parent plant is soon ready to transplant. Other herbs such as Costmary defy these methods. Bible leaf plants grow from a rhizome which is divided into new plants by cutting a piece of root with a leaf bud. These divisions also grow a clone of the parent plant.
All these herb plants are on a schedule with someone’s garden. We time our plants to be ready for their new home early this spring.

by Kenan White | Nov 5, 2012 | Basics, Gardening, Growing, Herbs, Seeds |
Sweet grass (Hierochloe odorata) is a Native American grass used in prayer and purifying ceremonies. It is one of the four herbs sacred to Native Americans. Growing Sweet Grass is not difficult once you have a plant, but obtaining that first plant can be difficult. The seed does not store well, or maybe not at all. Purchased seeds come many times with a guarantee of only ten percent germination. From my experience purchasing Sweet grass seed, zero germination is more accurate.
If you have a Sweet Grass plant that is thriving, there are two ways to increase your number of plants. The easiest way is to sow fresh seeds harvested from your plant. I keep an open flat of potting soil next to potted sweet grass. As seeds mature and turn brown, I gently cut the stalk and then strip it of seeds over the soil. Spread the seeds evenly over the surface and gently water. Sometimes the stem holding the seed is still green, but make sure the seeds are completely brown before harvesting. Germination will begin in one to two weeks; allow the seedlings to grow a few inches before transplanting to pots. The seeds ripen over time, so you may have to leave the flat with the plants and harvest ripe seeds as they mature.
Division is the next best way to obtain more sweet grass plants. This is best done in fall or winter to plants that are dormant. Sweet grass spreads in clumps with rhizomes. These shoots can be separated from the mother plant once they have formed new roots. To protect the mother plant, remove side shoots and leave the main clump together. This method can only produce a few new plants at a time and requires some plant skills The fresh seeds of Sweet Grass germinate readily and the plants produce plenty of seed, so this is the easiest method to increase Sweet Grass.

by Kenan White | Sep 28, 2012 | Basics, Gardening, Growing, Herbs, Life on the Farm, Seeds |
There is nothing easy about growing white sage; beginning with its seeds. White sage seeds are tested to a germination rate of twenty percent. Seed with this low of a germination rate are considered too old to use! Being a desert plant, white sage seeds will germinate in a few weeks or 80% will wait for six months to a year, maybe many years. This adaptation insures some white sage seeds will be ready for the next rain, even if ten years away!
This survival strategy is great for the desert, but makes germination uncertain in a greenhouse. Our cell trays are not a help, because we end up with dead cells or ones with too many seedlings. To insure a strong crop of white sage for the spring 2013 season, we resorted to an old fashion method of sowing seed. This means each and every seedling must be carefully transplanted to a cell. Being a species plant, there is wide variation in seedling size.
We carefully plant like sizes together. Watering is always the issue with white sage, well drained potting soil or garden soil with sand added are necessary. Wet soil can cause root rot quickly, never let white sage stay in wet soil!