How To Build A Butterfly Oasis

Butterfly gardening can be a wonderful way to experience wildlife in your garden, encourage pollination, and it takes very little maintenance, giving you more time to enjoy the beauty of watching butterflies flock to your plants. Many people who have maintained a butterfly garden for such a long time actually enjoy having visitors to come and look at their creation. This is also a great way to give back to your local ecosystem, as many natural habitats for butterflies and other pollinators have been destroyed by urban development and human interference. We always let about half of our test garden go wild in the summer, in addition to the many flowering shrubs and trees throughout the yard, to give butterflies a safe place to feed and lay their eggs. This is common practice, and we let this happen until the flowering shrubs and trees start to become an issue.


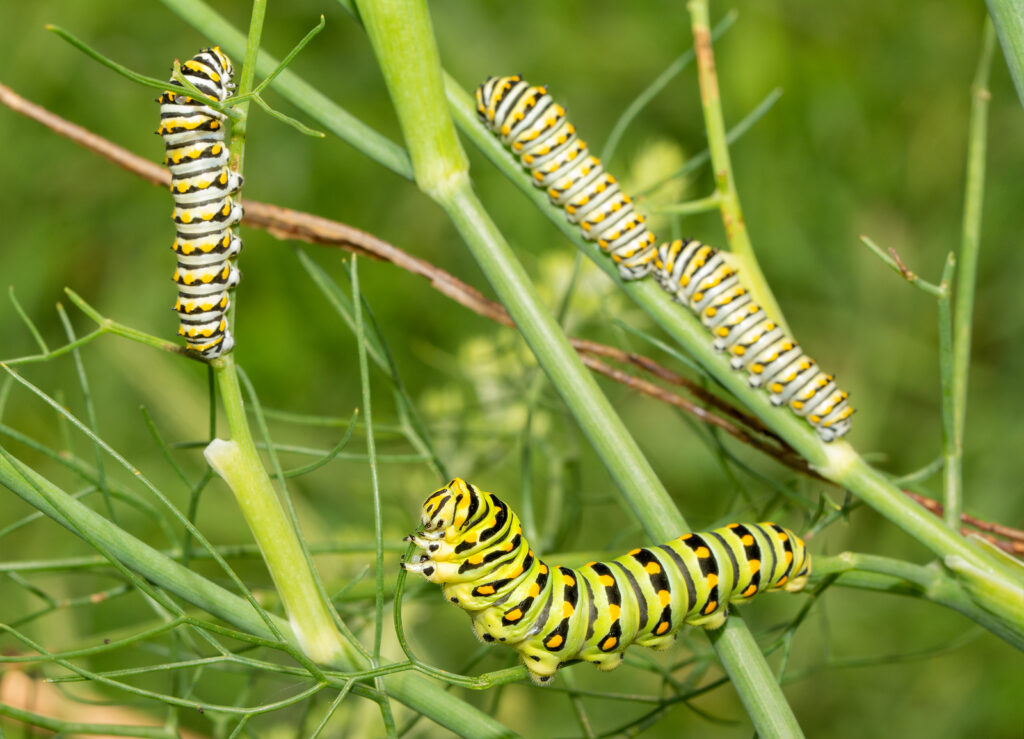
Here’s a wonderful photo showing a Fennel plant hosting Eastern Black Swallowtail butterfly caterpillars

In planning your butterfly garden, make sure to plant plenty of host plants and feeder plants. Host plants are specific herbs, flowers and other plants, that mature butterflies lay their eggs on because they create a safe haven for their young who will also feed on these plants once they become caterpillars. Be aware that these plants will be the sole food source for caterpillars, so it will be pretty heavily snacked upon. Because these may look rather ragged by the time the caterpillars are done munching on them, you may want to add these to the back of your garden, but still close to feeder plants so that the caterpillars are able to find them easily in their next stage of life. Some common host plants include Fennel, Italian Flat Leaf Parsley, Dill, Broccoli, Sunflowers, and Butterfly Flowers (also known as Milkweed).


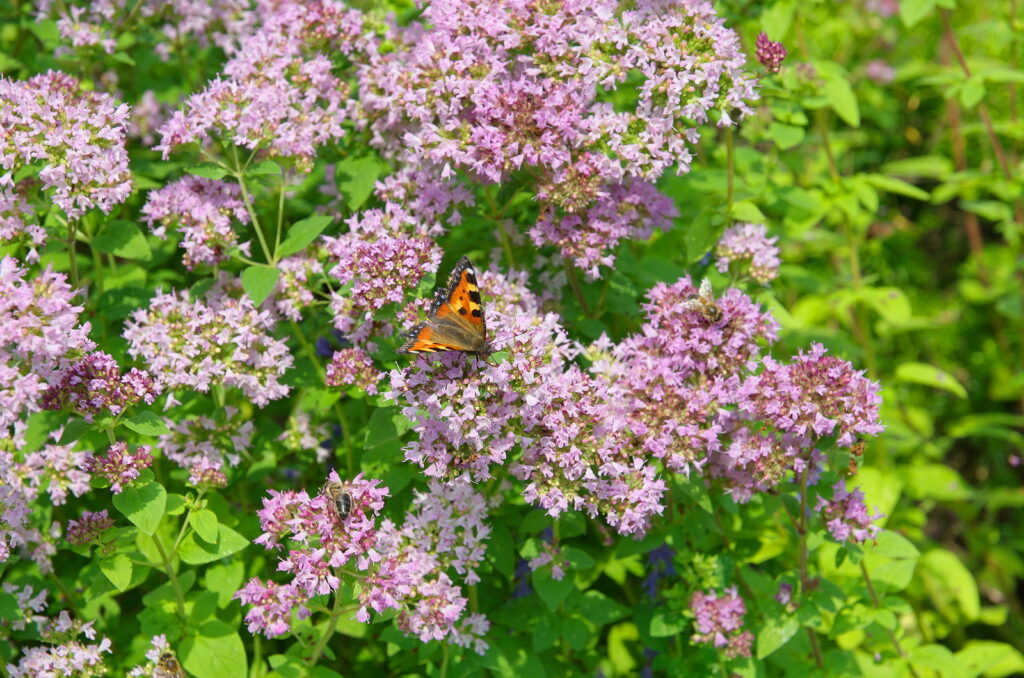
Butterfly on the flowers of oregano (lat. Origanum vulgar)

Feeder plants are nectar rich plants that adult butterflies will feed on throughout the season. These will also attract other helpful pollinators to your garden like honeybees and hummingbirds! Feeder plants tend to be fragrant and brightly colored, and you may be surprised to find that you already have many in your garden already. Some common varieties from our garden include Lantanas, Buddleias (also known as “Butterfly Bushes”), Joe Pye Weed, Bee Balm (Bergamot), Garlic Chives, and Oregano.


  • Remember to plant your perennial butterfly plants toward the back of your garden and your annuals toward the front, for easy seasonal replacing.
  • Don’t forget to incorporate herbs into your butterfly garden! Many herbs are perennial and will provide you with a safe haven for caterpillars and beautiful blooms when they flower. You can also use them in many other ways!
  • Choose an area that is protected by the wind, as butterflies are delicate and don’t want to fight strong breezes to feed.
  • Provide a water source, such as a birdbath or a shallow bucket filled with water with sand in the bottom.
  • Avoid using pesticides on your plants as these will harm the butterflies and their young.
Planning and Prep: Get to know your Plants

Planning and Prep: Get to know your Plants

The spring season is just around the corner. In 6 weeks, our shipping season is scheduled to begin to our warmest zones. That means we have got to have everything ready to go: plants well rooted, boxes ordered, and mentally be prepared to ‘rock and roll.’

But, like you, we are also avid gardeners, and in addition to getting things ready to fill your garden, we are gearing up for our gardens. We learned to strategize using past successes and failures, advice and recommendations from others, as well as my own updated ‘wish list.’ Order early, as it seems that the later you wait, the more you have to compromise. Not anymore! You know what they say about the ‘early bird’

Garden beds and containers are carefully planned on paper, using past notes (“planted too many tomatoes for my 4×6 bed” or “move cucumbers to another bed next season” or sadly “don’t try __ again, it doesn’t grow well here”). Additionally, think outside of the box (no pun intended) and consider what you want to create with these plants. You will be rewarded with more than you will ever use, and there is but so many folks in your life who want yet another bushel of your produces!  The list is endless, but I’ve gathered the recipes and am honestly planning ahead. Doing a lot of research you will learn that the DIY side of herbs, there is so much of what you are growing can be convert into batches of tinctures and salves! 

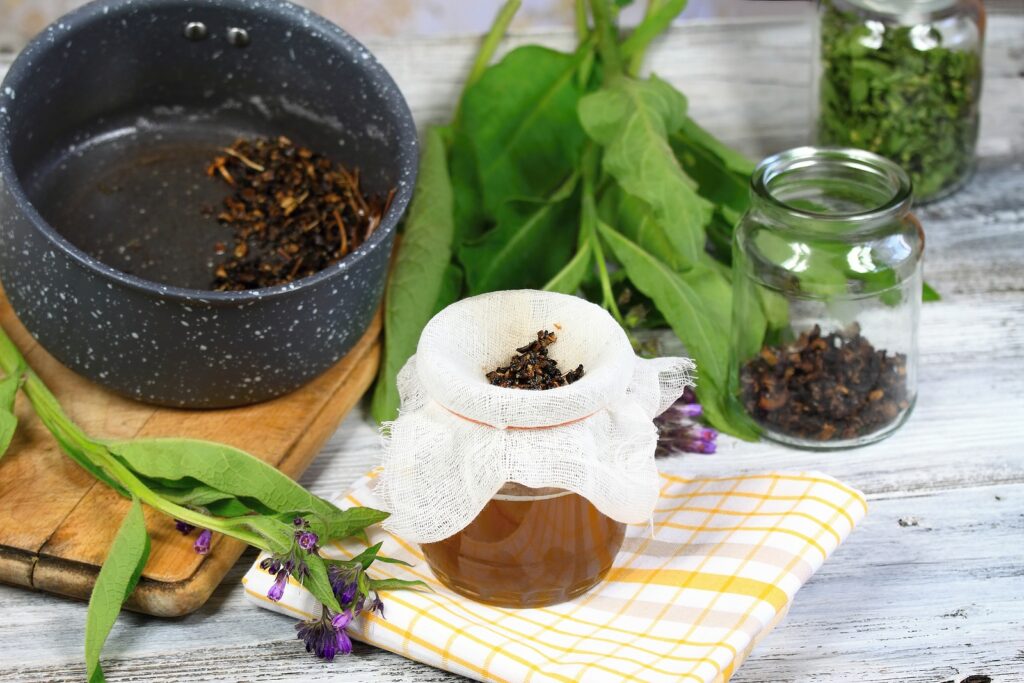
The many wonders of the Comfrey plant!

Common Comfrey is also referred to as ‘Knitbone’ as it is the plant’s high concentrations of Allantoin that helps reduce inflammation of sprains and broken bones. When mashed and heated into a poultice or applied as a salve, Comfrey can also make a wonderfully mild astringent great for ulcers and sores. The plant’s natural Allantoin levels also make it a great herb for after sun care. Just steep fresh comfrey into a tea for external use, by straining the leaves and letting it cool. You can then soak the sunburned areas in the cooled tea to help reduce pain and discomfort, and promote healthy skin regeneration.

So, the only thing you need right now is to start dreaming and take a few baby steps to make your dreams come true. Buy an inexpensive notebook, start writing down a ‘wish list’ of what you want to grow (and make sure you know WHY you want to grow it), sketch out your beds or containers keeping in mind the MATURE size of what you are growing, and start ordering your plants now. 

Herbs to Grow in Winter: 10 Herbs for Cold-Season Harvests

Herbs to Grow in Winter: 10 Herbs for Cold-Season Harvests

Winter is fast approaching: it’s time to pull out the scarves, boot socks, and chunky sweaters! While we might start out content, sipping our cup of hot cocoa, eventually, you know what happens… Cabin fever. We miss our garden. We miss fresh herbs. We miss summer! Solution? Continue to grow herbs in the winter! Which ones should you pick? Keep reading!

Growing Herbs in the Winter: What You Need to Know

What to Expect

During the winter months, all of your leafy friends (no matter how hardy) are resting. Don’t go into a winter herb growing venture expecting massive payouts.

To maximize their chances of growth, you will need to shield plants from winter elements. For example, Rosemary, Bay, Sage, and Thyme can survive on their own in pretty cold conditions (up to zone 5). However, if you actually want them to grow (a little), you will need to protect the leaves and roots from frost and nighttime lows.

And when we say “a little,” yes, we mean a little. If you give your plant’s the protection they need, you may see a few tender shoots, which you can harvest. 

If you have a mature perennial, don’t go chopping into its old growth. Why? This is where it keeps its energy reserves! Cutting off too much of your plant will cause its ultimate demise. (Good news? We’re always here for your replacement plant in the Spring!)

How to Protect Your Plants

If you’re overwintering some of your precious herbs outdoors, you will want to invest in frost covers. Even if you live in an ordinarily mild climate, these are good to have on hand for emergencies.

For container gardens, things can be much simpler: Just drag your potted plants into the protection of the garage during severe weather. It’s worth noting, you need to protect both the foliage and roots of potted plants from cold, which you can do by wrapping the pots in blankets.

Bringing Them Indoors

Arguably, an indoor windowsill garden is the easiest way to keep your stock of fresh kitchen herbs going in the winter! Remember, most popular herbs are from the Mediterranean and require at least 6 hours of full sun daily. So, get your sunniest spot ready, keep plants away from radiating heat, and be careful not to overwater! Looking for more tips? Read this.

How Much to Harvest

If you want your plant to live another day, never harvest more than 10% of the leaves and/or stems during winter. Wait to re-harvest until you see new shoots. 

If you’ve purchased plants simply to get you through the winter, pluck off what you need when you need it. Sure, your Basil or Cilantro might be bald by Spring, but that’s what we’re here for! 

How Many to Buy

If you’re purchasing plants expressly for winter harvesting, how many should you buy? Even in the best winter conditions you can muster, your plant’s growth will not be up to Spring or Summer standards. For this reason, you will need to invest in several of the same plants to fuel your kitchen creations. Our advice? Pick your favorite and line your windowsill!

10 Winter Herbs for Cold-Season Harvests

Winter Savory

Unlike its Summer Savory counterpart, Winter Savory is a perennial (up to zone 6). Unfamiliar with this herb? Treat it right, and it will bless you with a little bit of new growth during the chillier seasons. Savory is a component of the classic Herbs de Provence blend but can also hold its own in meaty recipes, like this Balsamic Herb Baked Chicken.

[wps_products product_id=”4317115580497″ excludes=”description” show_featured_only=”true”]

Chives

Indoors or out, Chives are easy to take care of and are hardy to zone 3. Plus, what’s more satisfying than a little “snip snip” of Chives on top of a Twice Baked Potato?

[wps_products product_id=”4317111779409″ excludes=”description” show_featured_only=”true”]

Mint

There are plenty of types to choose from… it’s good to know that Winter doesn’t have to put a damper on your Mojito intake and can actually make winter salad eating fun! Since the hardiness levels of Mint can vary depending on the variety, here’s a glance at the ones we offer:

  • Mint ‘Mountain’: Hardy to Zone 3
  • Mint ‘Orange’: Hardy to Zone 3
  • Mint ‘Peppermint’: Hardy to Zone 3
  • Mint ‘Mojito’: Hardy to Zone 4
  • Mint ‘Chocolate’: Hardy to Zone 5
  • Mint ‘Spearmint’: Hardy to Zone 5

[wps_products collection=”Mint Plants” items_per_row=”2″ title_color=”#6BBEE7″ show_featured_only=”true”]

Basil

Sure, you’re not going to put your Basil outside during a snowstorm. It needs a little more tender love than that! But, these annuals make the perfect addition to a sunny windowsill garden.

[wps_products product_id=”4317110206545″ excludes=”description” show_featured_only=”true”]

Tarragon

Tarragon is a hardy perennial to zone 4. Are you new to the world of Tarragon? For one thing, it’s a renowned companion plant, so it’s good to have around in the Spring and Summer. But its usefulness doesn’t end at the threshold; it’s definitely a winner in the kitchen. Imagine being curled up on a cold winter day, munching on a baguette smothered in Tarragon Butter. (Convinced yet?)

[wps_products product_id=”4317115842641″ excludes=”description” show_featured_only=”true”]

Sage 

This perennial is hardy outdoors to zone 5. Its flopsy, lambs-ear appearance makes for a beautiful garden and some delicious dishes!

[wps_products product_id=”4317115777105″ excludes=”description” show_featured_only=”true”]

Sorrel

There’s nothing quite like tart, sweet, exuberant Sorrel, which is hardy to zone 5. Keep it indoors in a bright location (or supplemented with a grow light). Once leaves are 4 inches long, you can harvest. Not quite sure what to make? How about this cozy soup!

[wps_products product_id=”4317116006481″ excludes=”description” show_featured_only=”true”]

Rosemary

It’s a classic. And dare we say: We all love it! Rosemary is hardy as a perennial to zone 5. Give it the protection it deserves, and your mature outdoor plant may reward you with some new cool weather growth. Are you a Rosemary fanatic? Well, then we suggest you buy a plant for your kitchen windowsill to fuel your wintertime cravings!

[wps_products product_id=”4317115056209″ excludes=”description” show_featured_only=”true”]

Parsley

Another fan favorite, Parsley, can easily thrive on a windowsill that receives sufficient light. Outdoors, your Parsley’s growth is going to “knock off” somewhere around 70 degrees. Inside, you can continue to harvest your Parsely until it’s bald and replace it in the Spring.

[wps_products product_id=”4317114826833″ excludes=”description” show_featured_only=”true”]

Cilantro

We are on Team Cilantro! Continue harvesting this zesty, fresh, summer-y herb through the winter by placing it in your bright windowsill (props to you if you have a heated sunroom!). Harvest sparingly, allowing your plant to recuperate, or go for the “big chop” and satisfy your guacamole craving! In all honesty, Cilantro doesn’t last that long anyway, so… have at it!

[wps_products product_id=”4317111156817″ excludes=”description” show_featured_only=”true”]

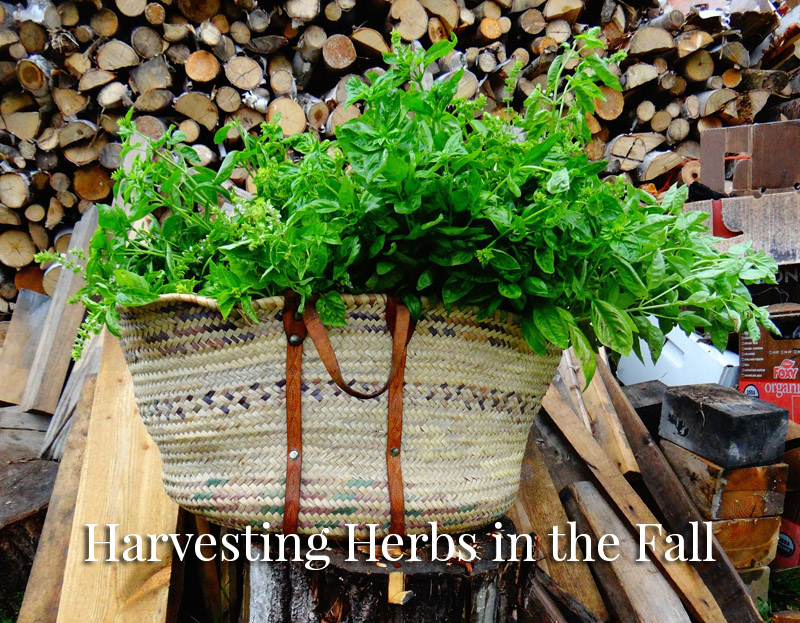
Harvesting Herbs in the Fall

Harvesting Herbs in the Fall

Herbs can add a whole new depth to your garden that you may not have had before. You can see how growing herbs can help you make your own herb blends and also how they can help you create new combinations that may have otherwise never come into your mind.

With fall right around the corner, far too many gardeners panic and make mistakes. Are you interested in learning how to harvest herbs in the fall without making common mistakes? Read our tips below to learn more about how you should handle the season when harvesting herbs in the fall.herbs-harvesting-fall
What Herbs To Harvest in the Fall

Before you dive in and start plucking herbs, you should pay attention to your selection. The timing for harvesting herbs is dependent on what type of plant they are, and other factors. For example, certain culinary herbs such as oregano may be more sensitive to dropping temperatures.

Many herbs will last up to four weeks, some up to six. As fall approaches, you should focus on harvesting the less-thirsty herbs first.

If you are looking for extra-long-lasting herbs, it is best to harvest in the fall, because they will last until spring. It is also important to note that herbs will not last as long if they are picked wet.

You must harvest herbs in the appropriate season to ensure that they are harvested at their peak. Keep in mind the fact that herbs that are starting to lose their flavor before harvest will take on a bitter taste when you cook them. Retain these herbs on your herbs table and harvest them as they dry out. You can also cut these herbs when they are already overgrown.
herbs-drying

Tips for Harvesting & Preserving Your Herbs

  • When harvesting herbs for immediate use there are a few rules to keep in mind. For single-stemmed herb plants such as basil and savory, only pick the center tip. This encourages bushy growth. Use the tops and flower buds of chervil, thyme, and mint. Use the outside leaves and stalks of your parsley plant and leave the center alone.
  • A major harvest requires a bit of work, but the rewards throughout the year are well worth the effort. You can get 2-3 major cuts from both annual and perennial herbs before the end of the season. The last harvest should be in early fall in order to give the new growth a chance to harden off before the first frost.
  • Choose a bright, sunny morning just after the dew has evaporated but before the sun gets hot enough to affect the oil content in the leaves and flowers. Take care in picking and use only healthy plants. Perennial herbs can be cut back by a third, while annuals can be cut to within three inches of the soil surface.
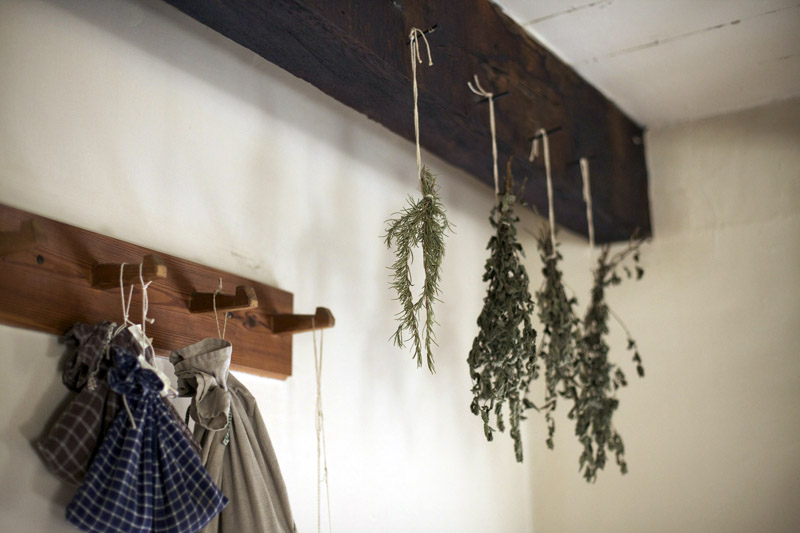
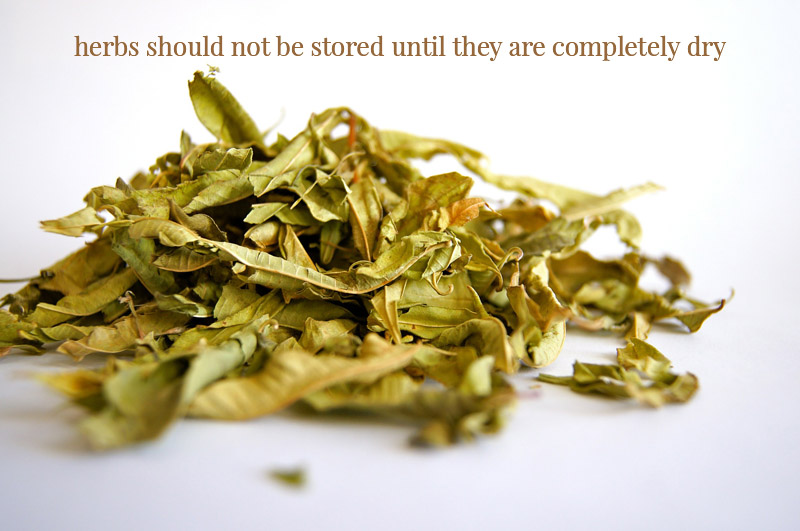
  • Rinse the fresh-cut herbs in cool water and use towels to absorb excess moisture. Tie the stems together (dental floss works well) in bundles of five or six and hang in a dry, well-ventilated spot, away from direct sun and moisture. The temperature should be no more than 85 degrees. Since herbs should not be stored until they are completely dry it is important to test them by placing a stem in an airtight container overnight. If condensation forms, more drying is needed.
  • Once the plants are dry, store them in clean, airtight containers (glass containers are best) and keep away from direct sunlight. Herbs lose their potency over time, so we suggest keeping them for a maximum period of one year. 
herbs-completely-dry

Get Ready for Winter

Many herbs will bloom during the summer months, but when the temperatures start to drop, the majority of them will begin to die. During the fall months, herbs should all be harvested and dried if you want to preserve them. Check the weather forecast and get the herbs dried off as soon as you can. This will help prevent them from freezing and dying in the cold.

Make sure you’ve harvested your herbs before they’re dried out. Just because the leaves are wilted, don’t just leave them on the plants. Harvesting herbs is much quicker if they’re dried completely.

So be sure to harvest the herbs and store them away as soon as possible. Herb gardening experts say green herbs such as basil, chives, and parsley should not be harvested until they’re completely dry. Similar to preparing your soil, choosing which herbs to harvest can impact the rest of your garden and the season as a whole.

Protect Your Herb Plants for Winter

Keep in mind that there’s only so much protection a pot of herbs can receive before the fall weather creeps in, leading to frosty conditions. Make sure to cover your plants up well before the temperature drops below 40 degrees.

It’s also good to keep a close eye on them when possible. See if they are drooping a lot, and protect the plants from your pets or kids by pinching off any extra stems. When cooking with herbs, there is usually a tight window where flavors are optimal.

The leaves on most herbs will be poisonous, but if you cut them off, then all you’re doing is removing the bitter end. Harvest in the right way when fall approaches. A lot of people will overlook how to harvest their herbs, especially when it’s time to bring them inside for the winter. There are some tricks to taking care of your herbs, though.

Harvest Herbs for Their Seeds

When you are planning to harvest your herbs for seeds, there are some considerations to keep in mind. Harvest herbs close to the time they will be harvested. If the herb has fallen off its seedhead by the time you harvest it, you will need to wait for it to fall over before harvesting the seeds.

Start by selecting and gathering your herbs. Remember, you will be collecting the seeds of your herbs for further propagation.

What type of herbs should you start collecting seeds from? When it comes to bushes, we like harvesting herbs such as oregano, mint, lemon balm, cilantro, and rosemary for their seeds.​​

A Few More Tips for Harvesting Herbs in the Fall

There are a few technical approaches you can use to harvest your herbs. Many people harvest their herbs by the stems. If you want to harvest herbs by the stem, you will want to use your garden shears or small snips. Snipping off the branches that are stem tips will produce smaller amounts of herbs. By using shears, the stems should be fully clipped, and you will be left with lots of leaves on the stems.

If you want to harvest herbs for their flowers, you can do the same as above, but you’ll need a few different types of tools to do it. Of course, if you want to go the organic route, you can always use your hands.

When using herb snips or shears, you will want to go around the entire plant first. Try to do it in sections. If you do it this way, you’ll be left with lots of leaves on the plant. With this approach, the leaves will be healthy, and they will continue to provide you with a full, vibrant, harvest for the rest of your autumn gardening.

Enjoy the Fall With Your Herbs

That does it for this piece. We hope that we have helped you learn a bit more about harvesting herbs in the fall. As you can see, you do not need to fear new seasons in the garden, as they present new opportunities for your herbs and plants.

To learn more about our approach to our herbs and our business, check out our FAQ page.

[wps_products collection="Culinary Herb Plants" items_per_row="6" title_color="#6BBEE7" show_featured_only="true"]

Grow Plants Indoors This Fall

Grow Plants Indoors This Fall

Order Indoor Plants

These plants ship in the Fall, pre-order today as plants will not last! 

Growing Herbs indoors can be easy if all the steps are checked. Sunlight…check. Proper soil…check. Proper watering schedule … check. Unfortunately, not all plants can be grown indoors. 

The vital component is knowing which herbs do best and which do not.  

We try to be specific on our site, and try to provide information on why some herbs do well indoors and why others do not.  We always suggest a basil, mint, parsley, and oregano. These are easy to grow and great to start with if this is your first time growing indoors.  

Rosemary and lavender are a bit trickier but they can be successfully grown indoors remembering that lavenders must dry out well between waterings. This can be tricky in the late fall and winter months, as plants are not in active growth and will not be drinking a lot of water during this time.  

A note of caution – make sure that you don’t crowd out your plants, as good air flow between plants is a must.

Put them into a 6” pot and give them sunlight!  You don’t really need fertilizer, but if you must, use a ½ strength dilution and use a fish emulsion. Turn those pots occasionally as you really don’t want them leaning in – just rotate for nice even growth.

We have a great Infogram on indoor growing that illustrates the importance of light on plants.  It’s helpful information for indoor growing of any plant, and followed up by more tips from us.  

We want you to have success with indoor growing so you can enjoy fresh cut herbs year round!

Why This Season Is the Perfect Time to Start Your Victory Garden

Why This Season Is the Perfect Time to Start Your Victory Garden

Shop Victory Garden Plants

Maximize The Gardening Space & Time You Have

Back in World War I, Europe had a huge food shortage, which prompted the creation of the National War Garden Commission. What resulted was American civilians growing fruits and vegetables to feed themselves so commercial agriculture could export to the European allies. They were called “victory gardens”. While we’re not currently in a physical war, it’s certainly a good idea to start victory gardens again. In our war against the novel coronavirus, picking up gardening as a hobby to bring homegrown food to the table can certainly be a fulfilling achievement!

Considering it’s summer, it’s the perfect time to start a victory garden if you don’t already have one. Here’s a quick guide to starting one!

Victory Garden Basics

You want to maximize the gardening space and time you have. Certain fruits and vegetables will grow within a specific timeframe. So you want to do your basic planning and ensure you stagger your plants in the most optimal fashion possible.

Traditionally, people would grow things like carrots, cabbage, lettuce, kale, tomatoes, beans, squashes, turnips, peas, and beets in their victory gardens. So those are great ones to start with.

No matter what you choose to grow, stagger them out so you get a good rhythm going where you can harvest your plants, eat your harvest in a short time, and have another harvest ready by the time you’re done consuming all your fruits and/or veggies. For example, plant 5 heads of lettuce at a time instead of 20 to reduce food waste.

Seasons for Crops

As we mentioned above, there are different seasons for various crops. If you want carrots, peas, lettuce, or kale, then it may be too late to plant them, as those are best planted during early spring.

The best crops to plant for summer include beans, corn, eggplants, peppers, squashes, tomatoes, basils and other herb plants. For the fall and even winter, think about planting lettuce, arugula, carrots, broccoli, beets, spinach, and parsley.

Come up With a List of Your Favored Plants

Not everyone will like every single fruit or vegetable, and that’s ok. Sit down with your family and determine which ones most of you like.

Then, with that list, determine how many of each you want to plant in your victory garden. If you want to try your hand at pickling anything, make sure to grow extra to account for that. For those just starting out or those with limited space; herbs are a great choice to grow. Herbs enhance flavor in all foods, from salads to steaks. Adding fresh herbs make food taste better! Herbs are versatile; each has its own growth habits and environmental needs. Select the herbs you will use; then find a spot where they can thrive and remain hardy when a few clippings are needed. 

Plant a Victory Garden for Fun With Your Family

As you can see, creating a victory garden serves many purposes. Not only can you get the satisfaction of growing your own fruits and veggies, but it can also be a fun pastime to do with your family members.

So get to researching potential crops to grow, order the seeds and any equipment you need, and have a blast for the foreseeable future!

Are you ready to start your victory garden? Then browse our selection of herb plants now!

Shop Victory Garden Plants

Maximize The Gardening Space & Time You Have