by Herb Exchange | Jul 11, 2015 | Basics, Gardening |
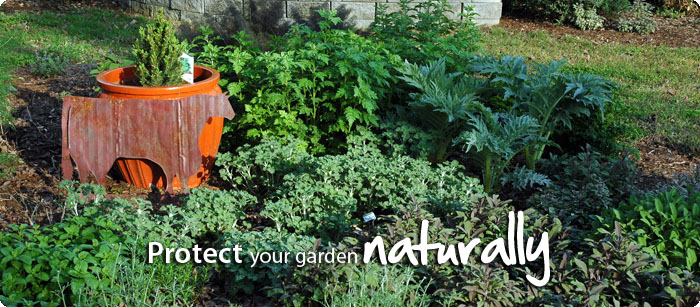
You have put a lot of hard work into your garden, and now it is time to protect it! The biggest pest problem you face is insects, and the easiest way to prevent insect damage is to create an ‘unfriendly environment’. Your best defense is a HEALTHY GARDEN. Here are a few tips:
Clean up: make sure that you keep your plants clean by picking off any dead or dying leaves and stems. Make sure to get rid of weak plants and take all of the plant material away from the garden area. You want to keep weeds and debris out of the garden as that is a perfect spot for insects to breed. Keep your tools clean, and disinfect if you have been working with infected plants.
Dry Foliage: We want you to provide your plants with water, but it is important that you water in such a way that you keep the foliage dry. Wet, soggy foliage encourages fungal growth, as well as insect infestation. The best time of day to water is in the early morning, as that allows the foliage to stay dry for the majority of the day. Drip irrigation is a great method to water the root system while leaving the foliage dry.
Feed Them: We recommend a diluted feeding of seaweed fertilizer once a week. Although it is a bit smelly, seaweed contains trace elements of iron, barium, calcium, sulfur, zinc and magnesium to encourage healthy growth and give them the strength to fight any potential disease. Our favorite product is made by Neptune’s Harvest: http://www.neptunesharvest.com/fs-191.html
Use Them: The more you use them, the better. Spending time pinching back, pruning or harvesting is time well spent. Routine inspection of your herb plants is a good means of not letting anything get out of control, and it is also a great way to relax.
Plant Based Insecticides: In the event that you need use an insecticide, we recommend using a plant based product. Plants actually produce many powerful chemicals to defend themselves against insects. Pyrethrum is a safe and natural insecticide made from certain species of chrysanthemum, has relatively low toxicity and breaks down quickly.
by Herb Exchange | Jul 11, 2015 | Basics, Gardening, Pests and Problems |

We’ve all got someone on speed dial in the summer months to help with these annoying pest, just in case we’re unlucky enough to have an infestation of insects in our home. I know a few people who have added a fly screen to their double glazed windows, in the hopes of catching these flies before they enter the home. But what did people do before the existence of these specialized teams, and could we bring back some of these traditional methods when we can’t get hold of a pest control service? Throughout history, man has been plagued by insects. And, man has fought back. But, not with DEET or OFF, but inventive uses of plants, although if you wanted you could use DEET free bug spray to fight them off, but once upon a time these didn’t exist so we have to use something else. These plants are still effective, and a natural means of keeping modern man comfortable from the bites and annoyances of insects, especially in the summer months.
Here are a few popular options. Read more about them below:

Feverfew shares the same natural insect repelling qualities because it contains the same natural chemical, pyrethrin. Feverfew is known to repel moths, cockroaches, flies, ants, mosquitoes, mites, bedbugs and mice! It is best planted outside along paths and close to windows and doorways and around patios. It is especially effective when planted with citronella geraniums, lemon grass and lavender.

Known as Fleabane, works to repel ticks and fleas, as well as mosquitoes and gnats. Crushed pennyroyal leaves can be rubbed onto the skin as an effective insect repellent. Additionally, you can also rub the leaves on dogs to help repel fleas and ticks. But be careful, pennyroyal could potentially be toxic to your dog, so if they have been infested with fleas and ticks, you may want to have a look at these essential oils for fleas and ticks instead, so you can help them to be free from these insects, as well as protecting their skin and coats at the same time. But it can be used effectively for other things. Pennyroyal is often used in commercial natural insect repellent creams and sprays. Pennyroyal is great to plant in the garden, but it is best utilized as a topical insect repellent applied to the skin.

A member of the Mentha family, is known to deter mice and ants if planted around the foundation of the home. It is recommended that you identify the ‘trouble spots’ where the pests are entering the home, and plant 3 – 7 plants at each entry point. Shallow bowls of water filled with mint leaves placed in the pantry is also known to keep mice away.

is a great mosquito repellent. Planted in large containers on a deck, patio or by the pool it does deter most flying pests. In the landscape, it makes a lovely grass with the same repelling qualities. It is especially effective when planted in combination with Feverfew and Lavender.

is most useful for repelling mosquitoes and gnats when planted in the garden; it can also be planted in pots and placed by doorways and windows. As with feverfew and lemongrass, lavender is best planted in the garden around seated and eating areas and also around windows and doors. You can cut and dry lavender and place on windowsills to stop mosquitoes entering the house. Put dried lavender in closets to repel moths and keep clothes smelling fresh.

has a mixed reputation and it is hard to say whether or not this LOVELY and EASY TO GROW geranium is actually effective at warding off mosquitoes. It has the citronella scent, which leads one to believe that it has the active ingredient used in so many commercial products. However, there are those who say that it is as far as it goes, fragrance. In our own ‘tests’ we think that when the leaves are crushed and rubbed onto the skin, there is nothing better nor more fragrant at fighting those buzzing nuisances!
There are MANY more plants to help with pest issues.
Checkout our full selection of herbs & plants that help repel insects naturally.
by Briscoe White | Jun 26, 2015 | Gardening, Miscellaneous, Pests and Problems |
These unattractive enemies have taken over my squash, and I am spending much of my time and energy in a war against them. Squash Beetles ~ nasty little things that suck the life out of the plants I’ve been nurturin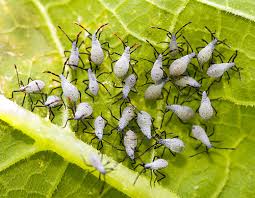 g since I first put seed to soil in mid March. You name it, I’ve tried it : Diatomaceous Earth, Rotonone Powder, Pyrethrum Spray … even the time consuming and not so pleasurable task of hand picking these creatures off of my squash leaves. I’ve read articles, researched remedies and honestly, felt a lot of stress that is not a usual part of my post-spring mentality. This ‘war’ runs against all of the reasons that I love growing plants; growing puts me back in touch with the natural rhythms and harmony of the natural world. I like working WITH nature, not against it. But, this is an on-going war and I refuse to surrender.
This whole unfortunate situation brings me back to the reason that I LOVE growing herbs and making an herb spiral. Although they are not 100% free of worries, herbs have VERY FEW natural ‘enemies’. My greenhouses are filled with over 150 different varieties of herbs, but I can safely say that not much of my time is spent ‘fighting’ or ‘fretting’ about pests. These plants are really not bothered by insects the way fruit and vegetable plants can be plagued. Most pest issues occur when trying to grow herbs indoors, but when planted in the garden, they seem to have much fewer pest issues. Not, the qualifier is that you provide the best growing conditions – enough light, water and make sure that there is good air flow around each plant. You do your part, the herbs will do theirs. On the other hand, I’ve done my part, and more, in the case of the squash beetles and all I’m getting is aggravation! Not sure who will ‘win’ this battle ~
by Kenan White | Apr 24, 2015 | Gardening, Herbs |
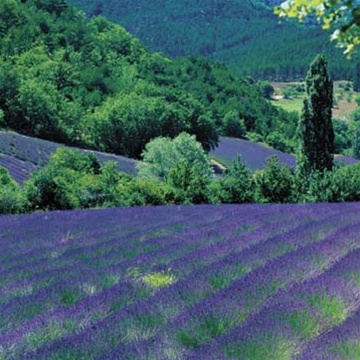
Lavender is one herb that many will find instantly recognizable, either by its soothing aroma or the distinctive purple blooms that grow in upright spears and bring droves of bees into the garden. While lavender can take a little longer to get established, this classic herb is well worth the effort. From aromatherapy treatments and topical applications for skin irritations and burns to a versatile potpourri and novel ingredient in recipes sweet and savory, lavender has a wide variety of uses around the home.
1. Treating Insomnia and Agitation: Aroma therapists have long touted lavender’s superior power to soothe nerves and aid in getting a sound night’s sleep. These treatments typically involve breathing in a lavender-laden vapor, drinking an infusion made from the dried petals, or dabbing a bit of the essential oil under your nostrils. A recent clinical study has also shown that lavender oil taken in capsule form can help to relieve anxiety and insomnia. Along with a soothing bath, when it is coupled with a good mattress from somewhere like Leesa, could also promote good sleep.
2. Relieving Headaches: Rubbing the essential oil of lavender on your temples or using a lavender-based aromatherapy treatment is also said to help provide quick relief for headaches. Drinking a warm infusion of lavender petals can also help to relieve flu and cold symptoms.
3. Topical Treatment for Skin Irritations: As a potent anti-inflammatory, lavender infusions are also helpful for treating bee stings, burns, and other topical irritants. Some people find that lavender honey, which is made by bees feeding primarily on lavender nectar, to be more effective than the essential oil for treating uninfected wounds. In addition to anti-inflammatory agents, lavender also has a natural antiseptic quality that makes this herb a useful addition to the herbalist’s medicine cabinet. (more…)
by Kenan White | Sep 16, 2013 | Gardening, Herbs, Seeds |

I am a Road Warrior! Before your mental image focuses, let me qualify that with the word “gardening”. So, what I really am is a Gardening Road Warrior. Let me explain that I am not zipping down the road at blinding speeds. No I am the one standing in the roadside weeds while cars and trucks of all kinds hurdle past me in their rush to get somewhere. The warrior part comes from the fact that one must be somewhat brave to be out here on the side of the highway. Safety aside, it looks, and feels a little weird too.
If not a warrior, then maybe I can be a hunter and gatherer? That is exactly what I am doing! I am out here on the side of the highway hunting for dried wildflowers so that I may gather their seeds. I have always been a traditional type of gardener, and feel this activity really reaches back to the roots of gardening. Having something I want as bad as the seeds I am hunting, gives the activity real meaning. When harvesting seeds, I am so intent upon my mission that I often forget it takes place on the roadside. Seeds are more about what they are going to be than just the seeds themselves.
Collecting wildflowers seeds, I image what would happen if I sowed them all this way or that. Creating visions of color that change with the season. A meadow in bloom or the Spring Prairie, with enough seed and a little land anything is possible. The small bags of seed I collect can plant acres of land, how such a small amount can create so much is one of the great mysteries we will never unfold. But as long as we know how, we need never know why seeds do as they do. All we need know are the few small requirements each seed needs to release their magic in the world. Is there anything else that says, “Just add water,” and will grow the Garden of Eden?
Yes, seeds are magic. And I can share in that magic. When possibilities are boundless, I can be a Road Warrior, or a hunter-gatherer, or prompt into reality a beautiful vision, or anything I want to be. As long as I do it in the garden, where just about anything is possible.
by Kenan White | Sep 6, 2013 | Seeds |

Saving Seeds for the Future
Many herb gardeners prevent their plants from producing seeds by removing flowers. It is well known that doing this will increase the potency of herbs harvested at The Growers Exchange. We see this all the time, as we allow all of our garden herbs to go to seed. When the plants begin to make seeds, they do not put much effort into anything else, such as growing new foliage. Plants usually end their season looking pretty haggard. They are worn out; existing foliage is by now old and has suffered the ravages of weather and summer sun. But standing proud and dried above it is the product of its efforts; a bunch of seeds ready, willing and able to make a whole lot of new plants. There is value and intrigue in that seed head.
To begin, let me explain that I am a seed collector, I am the one seen by the roadside, bucket in hand thrashing through the weeds. And yes, people do sometimes stop and ask if I need help? Am I lost? Or confused? And of course I have been asked for ID by sheriffs, deputies, police, and state troopers. But, they all leave me as they found me in the weeds, shaking their heads and muttering about how “it takes all kinds”.
Learning to Collect Seeds
But they don’t know what I know! There is treasure is those weeds! Every gardener knows that seeds are expensive. With a little planning, seeds fresher than any you can buy are there for the taking. I divide my collecting into wild seeds and garden seeds. All the roadside adventure happens while collecting wild seeds, but I want to explain how I collect herb seeds from my garden.
As a commercial grower of herb plants, our biggest unknown is obtaining viable herb seed. Seeds are alive even though they don’t look it. They lose viability with age; this is a process some of us gardeners are familiar with. To hedge, we harvest seeds as well as buy them, hoping for good germination, but having to wait weeks to know. Seeds freshly collected usually germinate near 100%, they are worth the effort of collecting and cleaning. The nursery office is surrounded by our Growers Exchange herb garden, where we grow all the herb plants we sell. Our garden is invaluable to the greenhouse, often providing seeds or seedlings when not available anywhere. The herb garden also allows us to be familiar with the plants through their lifecycle. We can be of more help to customers when we are growing herb in a garden just like them. Many customers’ questions have been answered by someone first going outside to see what our plants are doing.
Collecting Herb Seeds
Collecting seeds is easy! All you need is a bucket and a willingness to grab hold of bunches of dried plant. The most important thing is understanding the nature of the seed being collected. Once the seed head is dried, each has unique characteristics just like the flowers they once were. Look at the seed head and determine how they are going to fall when you begin. Some pods are like little pitchers, waiting to pour their contents; others, the seeds are the head and they must be removed from a center cone. The nature of the problem is mechanical, not horticultural. In other words, common sense will lead you to a successful harvest.
Fall is here and now is the perfect time to start seed collecting! Seed collecting saves money, and is the most economical way to reap new plants for your garden year after year. Many gardeners also enjoy sharing their favorite seeds with friends. Don’t be afraid to get your hands dirty when collecting herb seeds – you’re bound to be rewarded with surprises.
When to Collect Herb Seeds
The method I use, to collect seeds, is to set the bucket on the ground and bend the seed heads over the bucket. It is important that the heads be over the bucket when tipped, as the seeds may just fall out. Some seed heads need to be crushed and some rolled between your hands. Just do it over the bucket so it all falls in. Annuals are some of the best and most pervasive plants to produce from home-saved seed, but bulbs, perennials and even some shrubs and trees can be equally gratifying. Be prepared for some variation in seedlings, especially if collecting from F1 hybrids which are special varieties bred by the seed companies for consistency and robustness; the seedlings produced by these plants are not likely to have the same properties as the parent plant. However, the different characteristics may be good ones and it makes the whole process more exhilarating!
It’s not always obvious when seeds are ready. The correct time to collect seeds from their fruits may differ from the time they are ready to eat. Some seeds are very straightforward and basically require storing until they’re ready for sowing, either into pots under cover or directly outside. Others, however, may be a little tricky and require preparation before they’ll germinate, such as exposure to certain temperatures, soaking, or breaking the seed coat. Seed pods and seed heads will usually dry out when they’re ready for collection, becoming straw-pale and papery. If you want to hold on to a few of these plants to produce seeds for next year you’ll actively want them to ‘bolt’, or run to seed. Of course, a lot of seed collection is commonsense. Just think about what would happen in nature when seeds are ripe and aim to copy that.

How to Collect Herb Seeds
- Choose a dry, windless day. Select a healthy, pest- and disease-free plant, whose seedpods appear as if they are about to split. Remove the entire seed head.
- Invert the entire seed head upside-down into a paper bag. Close bag without crushing the seed head and label. Place bag in a dry place for the seeds to ripen.
- Check the seeds’ progress regularly. When most of the seedpods have opened, remove the contents onto a dry surface and separate seeds from any bits of seed head still attached.
- Extracted seeds will need to be properly cleaned before storing to remove any remaining debris. Dried seeds can be sorted from its chaff by shaking the whole lot through a series of graded sieves/screens. Stack the sieves with the largest mesh size on top and smallest at the bottom, tip the seeds in and shake. One of the sieves will be just the right size to collect the majority of the seeds, leaving the chaff behind in the remaining sieves.
- Store the cleaned seed in a small dry envelope, seal and label carefully. Keep in a cool, dry, airy place until ready to be used. If kept in an air-tight container and placed in the refrigerator, these seeds will be good for at least six years.

Cleaning Herb Seeds
Cleaning seeds is not too difficult. If a seed sieve is not available, raid the kitchen for one and grab the colander too. The large trash can be removed from the bucket by hand; leaves, stems, etc. The mess at the bottom is a mix of powdered dried plant and the seeds. Use various size screens to separate the two. In one of your screens you will find clean seed, the treasure you seek! These seeds should be stored in paper envelopes inside where temperature and humidity are controlled. Never, ever, ever store them in plastic or the refrigerator; one rots them the other dies them out.


You will have way more seeds than you will need. So, you should indulge in the gardener’s practice of sharing the bounty with fellow gardeners. Giving away flowers and veggies is great. But when you stop to consider the gift of seeds, you realize it is a gift of possibilities. And even though it has been said many times, when messing with seeds, think about what the Navaho say. The simple statement that creates endless possibilities: “See This Seed, It is Not a Simple Thing”. Think about what a seed looks like and what it is capable of and you will see that messing with seeds is messing with one of the great mysteries of life. Is there any wonder as to why we garden?


 g since I first put seed to soil in mid March. You name it, I’ve tried it : Diatomaceous Earth, Rotonone Powder, Pyrethrum Spray … even the time consuming and not so pleasurable task of hand picking these creatures off of my squash leaves. I’ve read articles, researched remedies and honestly, felt a lot of stress that is not a usual part of my post-spring mentality. This ‘war’ runs against all of the reasons that I love growing plants; growing puts me back in touch with the natural rhythms and harmony of the natural world. I like working WITH nature, not against it. But, this is an on-going war and I refuse to surrender.


