Useful Tips for Preserving Fall Annuals for Winter Use

Useful Tips for Preserving Fall Annuals for Winter Use

Humans have been using fresh herbs to boost the flavor of food and enjoy plant-based healing properties for centuries. Now, many of those healing properties have been backed by science–and you don’t need a study to tell you that fresh herbs will always taste better!

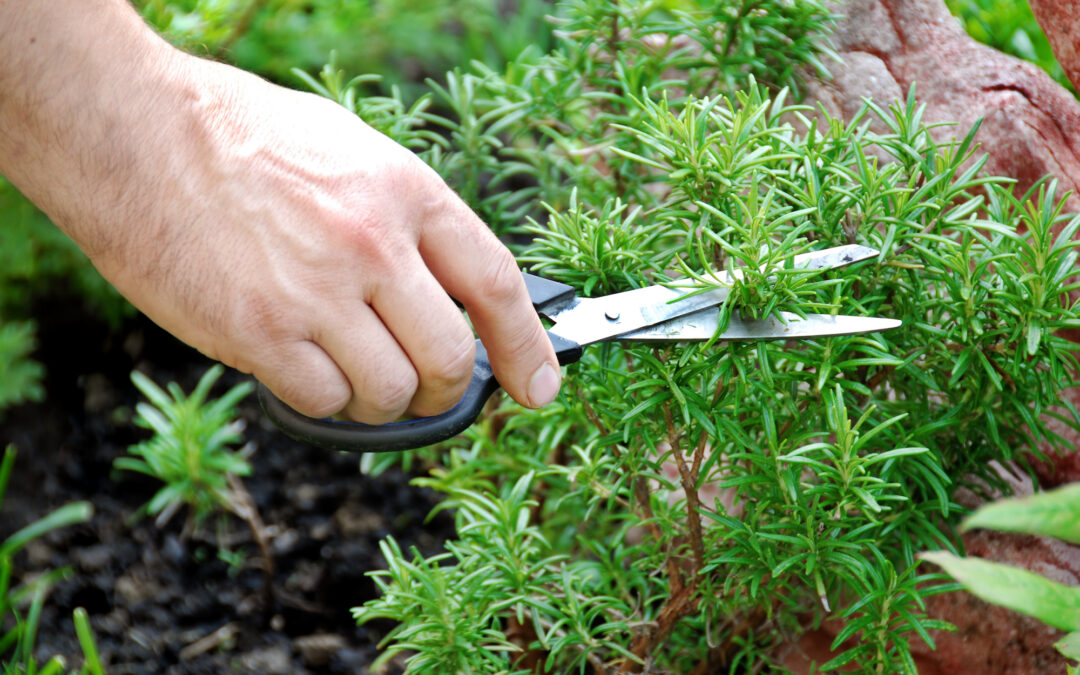
Stocking up on annual herbs is a great, cost-effective way to access fresh herbs in your kitchen. The question is, what do you do when your fall herbs go out of season?

Preserving fall annuals is surprisingly easy. Plus, many preservation methods ensure that you’ll still get great flavor and plenty of beneficial nutrients even after the plant’s life cycle is complete.

Read on for useful tips for preserving fall annuals. All of our methods are easy and delicious!

Preserving Herbs For Baking: Honey Herb Infusions

If baking is your passion, you’re going to love this herb preservation method. Honey herb infusions can run the gamut from floral-sweet to savory-sweet. You can use your honey infusions to flavor cakes, scones, bread, and more. Lemon Balm would make a great infusion with honey to add into tea to help combat seasonal colds and flu.

To create your infusion, we recommend using one cup of honey per every half to one cup of fresh herbs. Add all of your ingredients to a small saucepan and heat it on the stove over low heat. You want the honey to become runny but you don’t want it to boil.

Keep the mixture over low heat for five to six minutes. Then, cut the heat and allow the mixture to cool in the pan for about fifteen minutes before transferring it to a glass jar. 

 By using this flavorful herb, you’re cutting down on the amount of sugars used to artificially produce the same taste, and infusing your honey instead with nutritious natural lemony flavor.

Boosting Gut Health: Fermented Herbs

Fermented foods boost the growth of healthy gut bacteria, which can improve digestion and decrease a surprising number of health risks. Some culinary experts have given fermented herbs a shot and found delicious and pleasing results! If you’ve got an excess of fall herbs like dill on hand, grab some garlic and other aromatics and get fermenting!

Fermentation requires a perfect balance of water, salt, and environmental factors like temperature. The procedure varies based on the amount of herbs you intend to ferment, the size of the container you want to use, and more. We suggest doing some research to get your levels exactly right. If fermenting herbs doesn’t sound good, make homemade pickles with this mixture (plus vinegar) instead!

Drizzle or Saute: Oil Herb Infusions

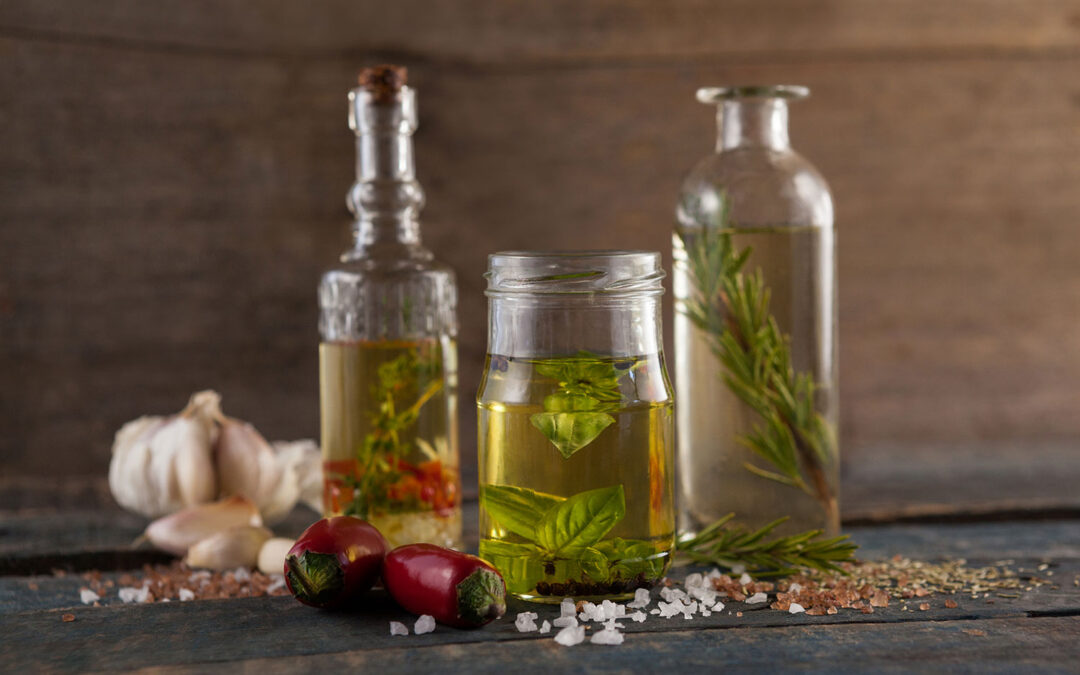
Honey isn’t the only thing you can infuse with herbs! Oil infusing herbs is another great herb preservation method that is easy to master. Our favorite infusion method is the no-cook method that keeps your herbs and oils at their freshest.

Grab a clean glass jar and fill it with the herbs of your choice, leaving about a half to a third of the jar empty. Cover the herbs with the oil of your choice (we suggest extra virgin olive oil) so that the herbs are fully submerged. Seal the jar and leave it in a sunny window, shaking the jar once a day.

After about three weeks, your oil is almost ready to go. Use a cheesecloth to strain the herbs out of the oil and get ready to drizzle and saute with your new fragrant oil herb infusion!

Steeping Teas and More: Dried Herbs

Freeze-dried herbs are some of the freshest and best-preserved herbs in the dried herb world. However, most of us don’t have a freeze drier lying around at home. The good news is that there are other methods available that are easy to follow.

One method is to dehydrate your herbs using a food dehydrator. Remember, a lot of fall annuals are on the delicate side, like basil, cilantro, and dill. Make sure your dehydrator temperatures aren’t too high, or you may end up with a little more crunch than you intended!

Another method is to bundle your herbs and hang them in a cool, dark space. Keep the stems as long as possible and tie them together with yarn or string. Then, hang your bundles upside down and let them dry out over the course of three to six weeks, depending on the variety. 

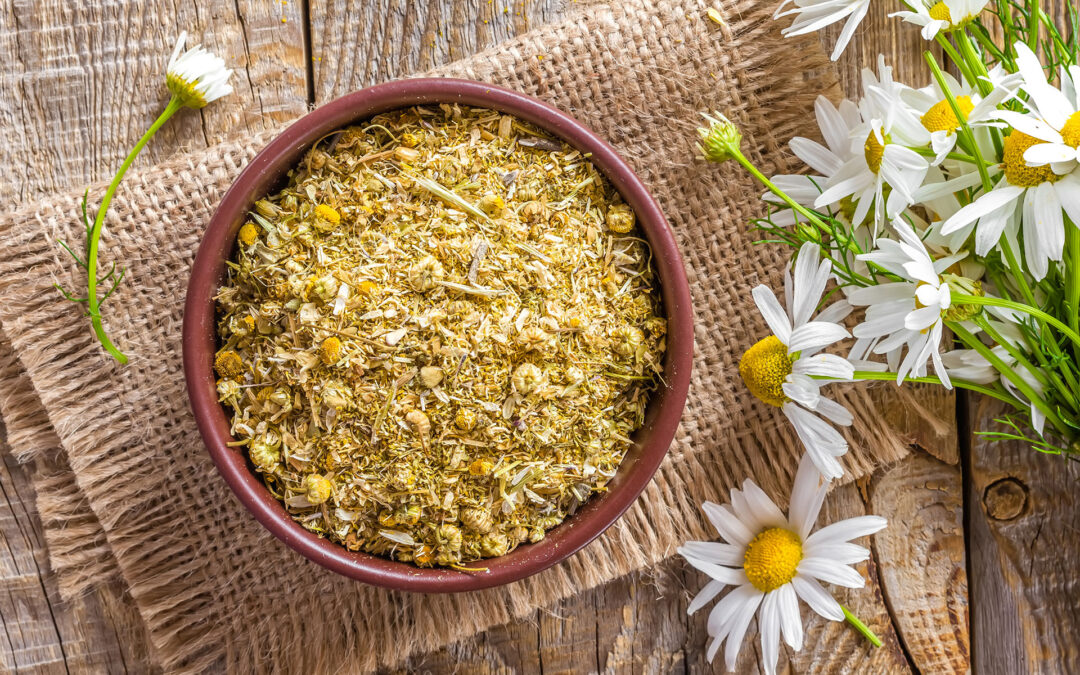
Once your herbs are dried, regardless of method, you can preserve them whole or crumble them up. The dried leaves will crumble easily and you can store them in an air-tight container like a glass bottle or a reused spice jar. Then, you can use your dried herbs to flavor food or create unique loose leaf teas–this method also works nicely for flowers like roses and chamomile.

Stocking the Freezer: Frozen Herb Cubes

The freezer isn’t just for microwave meals and frozen peas! There are plenty of fresh creations you can store in the freezer to use at your leisure later in the year. Having a tray of frozen herb cubes is one of our absolute favorite kitchen hacks.

To start, you’ll need at least one ice cube tray. Shape and size don’t matter but keep in mind that when you use one of your herb cubes, you’ll need to use the whole thing at once. You may want to choose an ice cube tray with small to medium compartments.

Chop up your herbs into small pieces and distribute them evenly in the compartments of your ice cube tray. Then, fill each compartment with an oil of your choice (again, we recommend extra virgin olive oil.) You can then put your ice cube tray in a freezer bag or directly into the freezer and pull out cubes as needed for sautees and soups.

Preserving Fall Annuals Made Simple

You don’t have to stop enjoying your annual herbs just because their seasons have passed. Preserving fall annuals can be fun and simple. What preservation methods will you try this fall?

Are you ready to start prepping for the fall growing season? Get your fall plant order in today with The Growers Exchange.

[wps_products collection="Annual Plants" items_per_row="6" title_color="#6BBEE7" show_featured_only="true"]
7 Common Herb Gardening Mistakes & How to Avoid Them

7 Common Herb Gardening Mistakes & How to Avoid Them

There’s something special about starting your own herb garden and watching the plants grow and flourish. It gives you a feeling of accomplishment and can replace store-bought ingredients in your favorite recipes. 

However, growing herbs in indoor and outdoor gardens can also be tricky. You need to know what you’re doing, or you could end up killing your herbs by mistake. 

If you’re looking to learn how to grow herbs the right way, this guide is for you. Let’s dive into a few common herb gardening mistakes and how to avoid them.

1. Growing Your Herbs from Seed

One of the biggest mistakes that homeowners and renters wanting to start their own herb garden make is to try growing herbs from seed. While it’s fun to watch herbs grow, it’s also a lot more difficult to succeed. 

On top of that, seeds typically cost the same amount as starter herbs. That means that you can start growing herbs from a healthy foundation without running the risk of your seeds not sprouting at all. 

2. Choosing Complex Herbs

If you’re just getting started with herb gardening, it’s best not to try to grow herbs that are particularly difficult. Instead, ease your way into herb gardening and start with plants that are more forgiving. 

For example, the herb basil is a fairly resilient plant and doesn’t require as much regular herb maintenance as other plants. That makes it a great choice if you’re new to the herb gardening scene.

[wps_products product_id="4317110206545" excludes="description" show_featured_only="true"]
[wps_products product_id="4317110501457" excludes="description" show_featured_only="true"]
[wps_products product_id="4317110566993" excludes="description" show_featured_only="true"]

3. Not Knowing the Different Types of Herbs

What many new herb gardeners don’t realize is that there are many different varieties of each type of herb. And each variety has a slightly different flavor profile connected to it. 

When getting started with herb gardening, you should make sure that you’re checking what variety of herb you’re getting. For instance, spearmint is very different from apple mint and can’t be used for the same recipes. 

[wps_products product_id="4752833839185" excludes="description" show_featured_only="true"]

4. Not Maintaining Your Soil

The soil that you use has a huge impact on your garden and the health of the plants you grow. That’s because the soil is what contains the nutrients that plants feed off of and use to grow. 

If you are using soil that hasn’t been worked to turn over fresh soil or that doesn’t have compost and nutrients added to it, it won’t be able to support your herbs. This can cause the plants to wilt and grow weak. 

When gardening with herbs, make sure to use potting soil with fertilizer to help you keep your plants healthy. This will make sure that your herbs are able to get the most out of the soil you’re feeding them. 

5. Not Planting Complementary Herbs

While most herbs taste great in our meals, not all of them are a good choice for planting with other herbs. That’s because they’re fast and aggressive growers which can cause them to take over space and nutrients from neighboring herbs. 

One of our top tips for indoor herb gardens is to make sure that you separate out voracious plants. For instance, mint and oregano should be planted in pots and kept separate from the rest of your garden. Otherwise, they could take over!

Before rushing out to purchase a plethora of herbs, be sure to check out which herbs will go well together and which should be separated. This will help you avoid an issue once your herb garden is already in full swing!

[wps_products product_id="4317114269777" excludes="description" show_featured_only="true"]

6. Watering Herbs Incorrectly

Many people who are new to herb gardening don’t realize that they need to be treated differently than your standard house plants. And that includes the way that you water them!

For instance, most herbs require regular yet moderate watering. This is especially true during hotter and drier summer months when they can dry out and wither. 

It also goes the other way too. Herbs that don’t have enough drainage can end up drowning in heavy rainfalls or overwatering them. If you’re growing herbs indoors, make sure that the pots you select have enough drainage to enable the plant to breathe.

7. Not Pruning the Plants

Pruning is just for trees, right? Wrong! As an herb gardener, you should be regularly pruning your plants to make sure that they’re growing healthily. 

The way to do this is to start trimming your plant once it rises to about 4 inches above the soil. Make sure you leave some leaves behind and then trim the plant so that you can keep it growing freshly. 

As you begin pruning more regularly, you’ll start to notice that your plants produce more herbs when you practice trimming them. They actually become happier and healthier plants and begin to yield more products for you to use. 

Finally, it also helps contain the plant. When herbs are left to their own devices, they can grow long, tall, or unruly. When plants are properly pruned, they are kept more confined and are a much tidier way to enjoy your favorite herbs. 

Avoid Common Herb Gardening Mistakes

With this handy guide for growing herbs, you’ll be able to avoid common herb gardening mistakes and make sure you’re producing healthy plants. Pretty soon, you’ll be adding homegrown parsley to your favorite soups and salads!

Ready to get started growing herbs in your own home? Join a network of home chefs and happy gardeners at The Herb Exchange and call our team to get the herbs you need today!

Falling in Love with Fall Herbs: Which to Pick & What to Do with Them

Falling in Love with Fall Herbs: Which to Pick & What to Do with Them

It’s officially (almost) over. It’s time to say goodbye to the summer garden, which is probably looking a little raggedy by now. But, don’t despair… the fun isn’t over yet! Now it’s time to select new, cool-weather-loving herbs to spice up your kitchen table. Which ones should you choose? What can you do with them? Is it just Pumpkin-Spice-lattes from here on out?

Why the Transition?

Your herbs have a life expectancy, and for many, they’ve reached the end of their rope. Why? Extreme heat and bolting will cause your favorite summer herbs to become bitter and even change their texture! July and August is the perfect time to give up the fight and call it quits on your annual and biennial plants, replacing the old with the new.

Which to Pick

Just as some herbs are summer-lovers, others are cool-weather-thrivers. Remember some of your favorite springtime herbs? Many of them are making an autumn comeback! Looking for a few suggestions?

  • Parsley
  • Cilantro
  • Chervil
  • Lovage
  • Arugula
  • Dill

What to Do with Them (& How to Love Them)

The good news: You aren’t condemned to a life full of pumpkin spice (if that’s not your thing). You can still enjoy summer-fresh flavors in the fall!

Parsley 

How to Love

Parsley needs 4-6 hours of direct sun each day, so plant your herb in an area that receives partial sun. Placing established plants in the ground will give you a much faster turn-around for usable amounts of foliage. Another bonus? Parsley grown in the fall produces more abundantly than springtime plants!

How to Use

Flat Parsley

If Flat and Curled Parsley were in a flavor fight, Flat Parsley would win because it has the most robust flavor. Its perky, bright, slightly bitter taste compliments many fall favorites: including this Parmesan & Parsley Roasted Butternut Squash. And, no, just because autumn is approaching doesn’t mean you have to say goodbye to pesto. Just make it out of Parsley!

Curled Parsley

Although it’s milder, Curled Parsley shouldn’t be overlooked. Its fresh flavor and charming foliage can make for an attractive garnish or take center stage in this Tabbouleh Recipe! Its soft, aromatic taste perfectly complements the punchier mint, which transforms into a lip-smacking treat with the addition of cucumber and lemon juice. (Please tell us you brought some lamb chops!)

[wps_products product_id="4317114761297" excludes="description" show_featured_only="true"]
[wps_products product_id="4317114826833" excludes="description" show_featured_only="true"]

Cilantro

How to Love

Cilantro loves cool weather and shorter days! If temperatures have cooled off in your area, place your plant in the full sun. For container gardens, make sure you plant your Cilantro in well-draining soil, adding extra perlite to the mix. These herbs do not require frequent fertilizing, but if their leaves start to yellow (and you’re confident you’re not overwatering), give them a nutrient boost.

How to Use

Thanks to Cilantro’s cool-weather-loving abilities, your “Taco Tuesday” tradition will still be going strong in the autumn. Looking for a new idea to “spice” things up? Give these tantalizing Garlic Cilantro Shrimp Tacos a try!

[wps_products product_id="4317111156817" excludes="description" show_featured_only="true"]

Chervil

How to Love

If you live in an extra-cool area (maintaining temperatures of 65 degrees), your plant will enjoy partial sun. However, if your daytime temperatures regularly rise above that, your herb should be in shaded conditions. Chervil enjoys staying evenly moist, so water when the first ½ inch of soil is dry. If you’re considering a container garden, Chervil is a perfect candidate for a self-watering pot (unlike many Mediterannean herbs).

How to Use

Chervil doesn’t get the attention it deserves! This delightful herb has delicate hints of licorice and anise; and is often compared to fennel, parsley, and tarragon. Never tried it? Now’s your chance! Welcome in soup season with this lovely Creamy Potato & Chervil Soup, teeming with bright, creamy freshness. This underutilized herb is also one of the four components in “Fines Herbes,” a classic French herb mixture (also including Parsley, Tarragon, and Chives) that is delicious on eggs, fish, chicken… and probably anything else you can think of!

[wps_products product_id="4317111681105" excludes="description" show_featured_only="true"]

Lovage

How to Love

Lovage enjoys sandy, well-draining soil that is kept constantly moist! If the soil dries out, the leaves will taste bitter. For in-ground gardens, layer mulch, peat moss, or another type of ground cover to maintain moisture. For container gardens, select a large pot to accommodate this plant’s bigger-than-expected root system. They are wonderful candidates for self-watering containers! 

How to Use

Do you love Lovage? Or is it new to you? Its flavor is somewhere between celery, parsley, anise, and mint… really, you just need to experience it for yourself! Venture on the sweet side with this addictive Lovage Icecream or enter “team saucy” with a Lovage Vinaigrette to make boring salads spectacular again!

[wps_products product_id="4317114499153" excludes="description" show_featured_only="true"]

Arugula

How to Love

Arugula requires 6 or more hours of direct sunlight, so plant it in a sunny location! While it prefers well-draining soil, it’s resilient and can usually tolerate less-than-perfect conditions. Maintain even moisture throughout the soil, especially if warm temperatures persist.

How to Use

Who doesn’t love the peppery leaves of Arugula, coupled with their crispy leaf texture? And no, in case you’re wondering, you don’t always have to make a salad. (Although, we suggest you do… they’re absolutely delicious!) Change up your Arugula routine by making this Three-Cheese Arugula Naan Pizza! Some extra perks? You can use premade Naan as the crust, making this a no-brainer mid-week meal that will have everyone smiling!  

[wps_products product_id="4317109944401" excludes="description" show_featured_only="true"]
[wps_products product_id="6583808753745" excludes="description" show_featured_only="true"]

Dill

How to Love

Plant your Dill in well-draining soil and place it in an area that receives full sun. Since this herb can become top-heavy as it matures, plant it in an area that receives (at least) some protection from harsh winds.

How to Use

Calling all you pickle makers out there! Whether you make your own Dill Pickles or not, you can still take part in this scrumptious Creamy Dill Pickle Salad, which is bursting with sprigs of fresh Dill from your garden.  Looking for something a little less “pickle-y”? These Braised Lemon Chicken Thighs with Dill and Turmeric might be right up your alley! 

With a few tips and recipes under your belt, we trust you are falling in love with fall herbs. Now head over to the shop and grab your favorites before it’s too late!

[wps_products product_id="4317111582801" excludes="description" show_featured_only="true"]
[wps_products product_id="6583803871313" excludes="description" show_featured_only="true"]
Get Your Shears Ready: Why, When, and How to Prune Your Lavender

Get Your Shears Ready: Why, When, and How to Prune Your Lavender

It’s a fact: Life is lovelier with Lavender. It enhances our food with aromatic flavor, gives the air a sweet summertime scent, and feeds our favorite pollinators! But now’s the time for you to give back to your Lavender plant with a bit of TLC. Why, when, and how should you prune your Lavender?

The “Why”

Lavender is affectionately known as a “sub-shrub” or “semi-shrub.” Why? It can’t decide whether it’s a flexible herb or a woody bush.  You’ve probably already noticed your plant’s anatomy: old growth becomes hard and barky, while new growth is soft and supple. If you fail to prune your plant’s new growth, more and more of your plant will become woody.

You might be wondering: What’s the big deal about that? Woody portions of your Lavender plant are much more brittle, susceptible to frost, prone to rot and disease. Plus, they produce fewer leaves and flowers, making for an aesthetically “bald” Lavender plant. Not so great, right?

The “When”

For the most devoted Lavender parents, it’s recommended that you prune your plant in the Early Spring and Late Summer.

A Spring pruning consists mainly of “clean-up” from damage your plant experienced over the winter months. It’s worth noting: this early pruning can result in delayed flowering.

The Late Summer pruning is the most thorough! Wait until your Lavender plant has finished its flowering cycle. If you live in an area that experiences early frosts, put your pruning on the priority list for August. Waiting can result in frost damage. If you’re in a warmer climate, you can prune as late as early September.

The “How to”

The extent of your pruning project will depend on your variety of Lavender and its age. Extensive pruning is reserved for established plants that are at least 2 years old. Youngsters benefit from regular “pinching.”

The Basics of Lavender Pruning

Pinching Young Lavender Plants

When your little Lavender develops new tips, pinch them off. Why? This will encourage your plant to create more branches, making it bushier over time. Early pinching also gives you some control over your Lavender’s shape and size; waiting to shape your plant until it’s woody is a big mistake! 

Pruning Established Plants

So, this is going to sound like a lot. Are you ready? You will prune off ⅓ of your Lavender. Bad at math? Thankfully, these herbs are pretty forgiving. If you’re off by a little bit, you can still expect your plant to bounce back. However, pruning ½ your plant or more usually puts you in the danger zone! 

  1. Get your clean pruning shears ready!
  2. Take a few steps back, eyeballing your plant.
  3. Cut a ⅓ of a stem.
  4. If you’re a nervous first-timer, you can use your first cut stem as a “measuring stick,” cutting other stems to the same length.
  5. Have fun with it: this is your chance to shape your Lavender plant! 

Just a reminder: You should prune your Lavender (at least) 2-3 inches above the woody stem. Why? Pruned wooden branches will not produce new growth. You’ll just be stuck with an ugly twig. (Don’t say we didn’t warn you!)

Pruning Old Lavender Plants

Are you trying to get your Grandma or Grandpa Lavender to look healthy and lush again? You should continue pruning your plants, even when they become “extra established” (aka old). To encourage new growth and minimize their woodiness, stretch your normal pruning limits. Prune branches 2 inches above the woody sections. Doing so will give your plant its best chance to make new, healthy growth. And, remember, we’re here for you when you’re ready for your next generation of Lavender.

Pruning Reminders for Specific Species

Not all Lavender is the same: some are hardier than others, and some have different growth habits! So here’s a look at some of the specific Lavender varieties we offer:

Lavender ‘Hidcote’ & ‘Munstead’ & ‘Rosea Jean Davis’

These three are all English Lavender varieties, with a compact, low-profile growing habit. The ‘Rosea Jean Davis’ gets a special mention: It sports pretty pink flowers! Expect blooms in the late Spring or early Summer. Once the flowers are exhausted, dead-heading will encourage your plant to bloom again! Wait until late August for extensive pruning.

[wps_products product_id="4317113679953" excludes="description" show_featured_only="true"]
[wps_products product_id="4317112991825" excludes="description" show_featured_only="true"]
[wps_products product_id="6589390356561" excludes="description" show_featured_only="true"]

Lavender ‘Grosso’ & ‘Provence’

What do you get when you combine English Lavender with Spike Lavender? You guessed it: these two varieties! They have longer branches, flower stems, and flower spikes that grow from the plant’s center. Lavender ‘Grosso’ and ‘Provence’ have a long blooming period, through early-late Summer. Once it’s over, get ready for your August pruning! Since these plants have such long stems, you can chop as much as ½ of your plant!

[wps_products product_id="4317113122897" excludes="description" show_featured_only="true"]
[wps_products product_id="4317113319505" excludes="description" show_featured_only="true"]

Lavender ‘Goodwin Creek Grey’

While most Lavender is renowned for its beautiful blooms, this one is known for its attractive, silver-grey foliage! Its flower spikes are shorter and smaller than other varieties. Still, they are a unique deep blue-violet color, giving this plant an unexpected pop. As a hybrid, it was bred to withstand higher heat and humidity, making it a hardy variety. Follow the pruning instructions in the “How to” section to maintain your plant’s size!

[wps_products product_id="4317113417809" excludes="description" show_featured_only="true"]

Lavender ‘Phenomenal’

This is the lovechild of English and Portuguese Lavender: giving it excellent cold tolerance and a remarkably long blooming time! Blossoms begin around June and last until Fall. If you live in an extra chilly climate, you should do your “major” pruning in the early spring before flowering begins. Why? Your plant will enter winter in ‘one piece,’ without any vulnerable wounds. Extra perks? Since this variety is a late bloomer, Spring pruning won’t interfere with your flowering season. You will also get to enjoy those blossoms as long as possible!

[wps_products product_id="4317113647185" excludes="description" show_featured_only="true"]

Lavender ‘French’ & Lavender ‘Silver Anouk’

Expect early spring blooms, with a compact shape, crowned with fully open blossoms. French Lavenders and Spanish Lavenders are the least hearty of the bunch, so treat them tenderly! Deadhead after its first flowering: taking care not to trim too close to the plant’s base. Hopefully, it will reward you with a second round of blooms.

[wps_products product_id="6585496502353" excludes="description" show_featured_only="true"]
[wps_products product_id="4317113516113" excludes="description" show_featured_only="true"]
Your Essential Guide to Harvesting Medicinal Flowers

Your Essential Guide to Harvesting Medicinal Flowers

Growing and harvesting medicinal flowers is one of life’s simple pleasures that can bring enormous joy and satisfaction. Herbs for medicinal use will grow almost anywhere. No matter what shape, size, or aspect your outdoor space has, it’s possible to successfully cultivate plants that may be used for medical purposes.

Read on to discover our top tips to ensure you obtain the very best quality harvesting results, as well as additional information for correctly harvesting a number of common medicinal herbs.

Before using any herb for medicinal purposes, we recommend consulting a suitable professional. 

General Guidelines for Successful Harvesting

  • Make sure that the herbs you’re harvesting have been grown in a suitable environment. Ideally, herbs should be grown organically, without the use of chemical fertilizers or pesticides. The soil, water, and air your plants use should be as fresh and natural as possible.
  • Check that you have the correct species of herb. Some herbs have a common name that includes a number of different species. If in doubt, buy medicinal herb plants from a reputable source so that you know you’re cultivating the correct plant.
  • Allow herbs to become well-established and strong before harvesting.
  • Check that the plant is at the correct stage of its lifecycle for harvesting to take place. For example, if you intend to harvest flowers, the plant will need to have matured to the flowering stage of its lifecycle.
  • If you are harvesting a perennial herb, harvest sustainably so that the plant has enough leaves or flowers to survive through to the next harvest season.
  • When harvesting annuals, consider allowing some to self-seed. This will frequently result in a new crop next year, without the need for replanting.
  • Although herbs can be picked at any time of the day, if you intend to dry, process, or store them, we recommend picking them early in the morning, once the dew has dried but before they face the full heat of the sun.

Chamomile

Possibly one of the more well-known herbs, many people enjoy chamomile flowers made into tea. Although both leaves and flowers are safe to eat, it’s the flowers that make the best tea.

To harvest chamomile, wait until the plant has plenty of flowers. Pick the flower heads early in the morning, ideally before the flowers have fully opened. Chamomile flowers can be used when freshly picked, or dried and stored for future use. 

Chamomile is a perennial plant, so once established it should continue to provide flowers year after year. It’s a tricky plant to grow from seed, so we recommend that you buy chamomile plants to make life easier. 

[wps_products collection="Chamomile Plants" items_per_row="4" title_color="#6BBEE7" show_featured_only="true"]

Calendula

If you are intending to use marigolds for medicinal or culinary use, make sure to use calendula officinalis, rather than related species – all marigolds are not the same! 

The best time to pick calendula blooms depends on what you intend to use them for. If you want to use fresh flowers for a salad or tea, pick the fresh, new blooms. Flowers that are beginning to wilt or that have become over-blown are best left to fade completely, and the plants used for seed harvesting.

Calendula leaves can be added to salads – they have a distinctive taste that can add a kick to any salad plate.

This is an annual plant, so a fresh planting will be needed each year unless you leave a proportion of plants to self-seed.

[wps_products product_id="4317110763601" excludes="description" show_featured_only="true"]

Echinacea

Echinacea is a hardy herb that requires minimal care to grow successfully. As a perennial plant, once established it will grow year on year. Echinacea can be difficult to grow from seed. Luckily, you can buy medicinal herb plants like echinacea, which come pre-established.

The roots, leaves, and flowers of the echinacea plant can all be used for medicinal purposes. The type of harvesting will depend on which parts you wish to use. We recommend planting a few echinacea plants so that if you choose to use the roots of one or two, there will still be plenty left for later harvest.

[wps_products collection="Echinacea" items_per_row="4" title_color="#6BBEE7" show_featured_only="true"]

Nasturtiums

These hardy annuals provide a stunning splash of color for borders, hanging baskets, and container planting, as well as having a number of culinary uses. The leaves, seeds, and flowers are all edible.

Although flowers can be harvested separately, it’s usually easier to harvest the entire plant. Nasturtium seeds are a particularly tasty delicacy – leave the flowers to seed and then harvest once the seeds have formed. Patience is a virtue when it comes to nasturtium seeds – the bigger they are when picked, the tastier they are. Bigger seeds are also more likely to germinate, should you wish to harvest seeds to plant next year.

[wps_products product_id="4317114794065" excludes="description" show_featured_only="true"]

Garlic Chives

Garlic chives are a perennial that can be harvested at almost any time of the year. Garlic chive leaves are the part of the plant that’s used. These can be cut to within about an inch of the ground for culinary or medicinal use. In time, the leaves will regrow, providing a fresh crop.

Chives are best used fresh. Their long growing season means there’s less need to dry and store them in comparison with other herbs.

[wps_products product_id="4317111255121" excludes="description" show_featured_only="true"]

Yarrow

Yarrow flowers are commonly harvested for a range of purposes. Simply cut off the flowerheads when the flowers are fresh. Avoid over-blown or faded blooms. Yarrow is a perennial plant, so will grow from year to year provided its harvested sustainably.

Like many other perennial herbs, Yarrow doesn’t grow well from seed. We recommend buying established Yarrow plants to optimize the chances of a successful harvest.

[wps_products product_id="4317109846097" excludes="description" show_featured_only="true"]

Harvested correctly, medicinal herbs can provide a generous yield that can be used for a range of purposes. Well-established, healthy plants are going to give the best harvest, which is why we recommend buying medicinal herb plants.

Buying a healthy, established plant increases your chances of a successful harvest and removes the worry and uncertainty which can come from attempting to grow herbs from seed.